前言
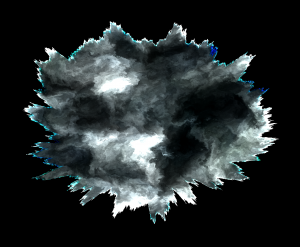
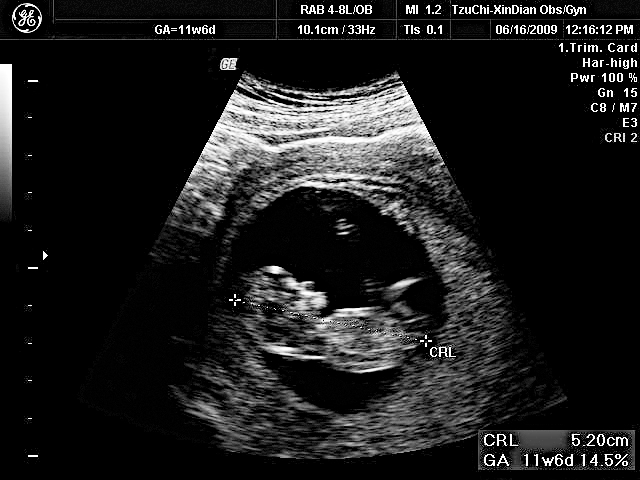
鑒於APIL曾推出過類似的專案,藉由科技教育的方式讓使用者能用更少的成本進行訓練。本文將介紹如何使用電腦圖學知識與工具,開發出如下的及時渲染超音波特效。
內容目錄
超音波原理
透視圖
邊緣高光
強度圖
Radical Blur
上層皮膚模擬
扇型裁切
內臟透視
Stencil masking
雙Pass覆寫深度
用戶操作
額外閱讀
參考文獻
建議先備知識
- Unity 基本操作概念。
- Shader lab 或 GLSL 、 HLSL 等渲染語言知識。
- 基本線性代數、三角函數知識。
超音波原理
由感測器發出聲波,返回的是該聲波垂直向下的頗面回聲(echo)圖,echo越強的像素越白。 因為器官表面不平,會產生音波漫射(diffuse),所以大部分是灰的。
- 液體和空氣幾乎沒有回聲,所以是黑的。
- 組織到另一個組織時,若材質差異大,會產生邊緣高光(specular)反射。
- 漫射的光會造成雜訊、顆粒感(speckle)。
- 聲波每經過一層會反射的物質,其強度減弱,產生陰影。
- 離感測器最近的組織回聲最強,隨著滲透越深,強度衰弱(attenuation)。
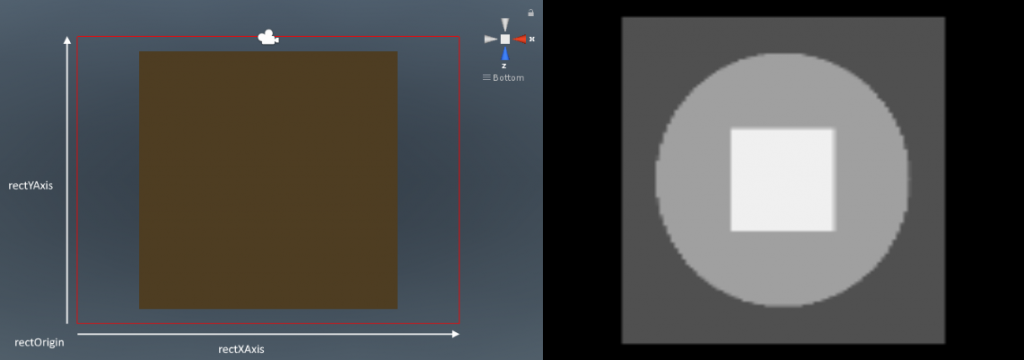
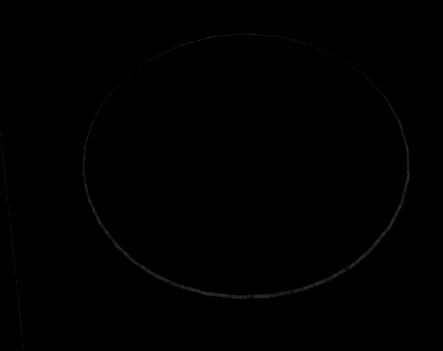
透視圖
先準備正常內臟模型,寫個簡單的透明shader並用alpha控制透明度來代表透光程度,讓攝影機最終呈現如圖:

事前準備
可使用任意模型,例如本範例使用Unity Asset store上的Human Organ System PBR模型素材。
https://assetstore.unity.com/packages/3d/characters/humanoids/humans/human-organ-system-pbr-175755
使用Shader渲染模型切面
使用透明混合(blend)技術,可看到方塊內還包含著另一個圓與方塊。
Tags {
            "RenderType" = "Transparent"
            "Queue" = "Transparent"
            "IgnoreProjector" = "True" }
        LOD 100

        Pass
        {
            Blend SrcAlpha OneMinusSrcAlpha
            ZWrite Off
				}
				...
				fixed4 frag(v2f i) : SV_Target
            {
                fixed4 col = tex2D(_MainTex, i.uv);
                col.a = _Alpha;
                return _Alpha;
            }
混合Shader code
邊緣高光
藉由sample 該uv的顏色與上面一點的uv的顏色,相減後取得顏色變化差距。 (只取上面的顏色變化是因為我們假設聲波來源是上面)
v2f vert (appdata v)
            {
                v2f o;
                //假設音波來源是上中央
                float2 sourcePosition = float2(0.5, 1);
                o.vertex = UnityObjectToClipPos(v.vertex);
                o.uv = TRANSFORM_TEX(v.uv, _MainTex);
                //上緣uv位置
                o.uvabove=v.uv.xy + (sourcePosition - v.uv.xy) * _MainTex_TexelSize.y *_EdgeSize;

                return o;
            }

            fixed4 frag (v2f i) : SV_Target
            {
                fixed4 col = tex2D(_MainTex, i.uv);
                fixed4 above_col=tex2D(_MainTex, i.uvabove);
                return col * abs(above_col-col)*10 ;
            }
            ENDCG
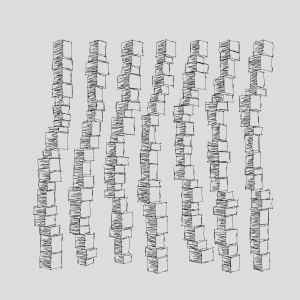
強度圖
將顏色由貼圖上方往下加,最後反轉後會得到如速度線的效果。

struct v2f {
    float4 pos : SV_POSITION;
    float2 uv : TEXCOORD0;
    float2 toSource : TEXCOORD1;
};

v2f vert(appdata_base v) {
    v2f output;
    // ...
    float2 sourcePosition = float2(0.5, 1);
    output.uv = v.texcoord.xy;
    output.toSource = sourcePosition - v.texcoord.xy;

    return output;
}

half4 frag(v2f input) : SV_Target {
    half4 output = half4(0, 0, 0, 1);
    float2 normalizedToSource = input.toSource / length(input.toSource);
    float2 texelToSource = float2(normalizedToSource * _MainTex_TexelSize.y);

    // _TexelSize.w is automatically assigned by Unity to the texture’s height
    for (int i = 0; i < _MainTex_TexelSize.w; i++) {
        output += tex2D(_MainTex, input.uv + texelToSource * i);
    }

    return output;
}
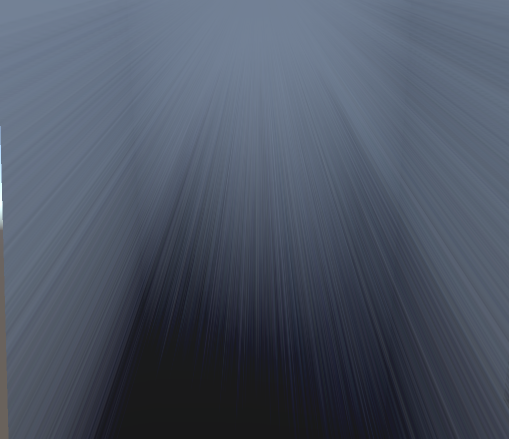
Radical Blur
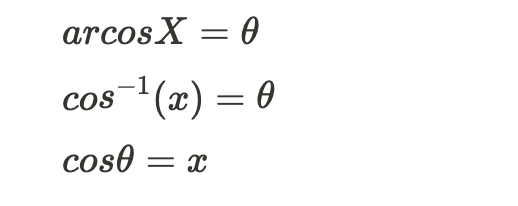
原理:根據(x,y)找到對應的( r , θ) 座標,取鄰近像素座標 ( r , Θ) =(r , θ ± l / 2 ) 平均值輸出。
struct v2f
        {
            float4 pos : SV_POSITION;
            float2 uv : TEXCOORD0;
        };

        sampler2D _MainTex;
        float4 _MainTex_TexelSize;
        float4 _MainTex_ST;
        float _BlurSize;
        float2 _BlurCenter;
        float _Iteration
        v2f vert(appdata_img v)
        {
            v2f o;
            o.pos = UnityObjectToClipPos(v.vertex);
            o.uv = TRANSFORM_TEX(v.texcoord, _MainTex);
            return o;
        }

        float4 frag(v2f i) : SV_TARGET
        {
            float2 blurVector = (_BlurCenter.xy - i.uv.xy) * _BlurSize;
            float r = length((_BlurCenter.xy - i.uv.xy));
            float angle=acos((i.uv.x - _BlurCenter.x )/r);
            angle *=sign(i.uv.y - _BlurCenter.y);

            float4 acumulateColor = float4(0, 0, 0, 0);

            for (int it = -_Iteration; it <= _Iteration; it++)
            {
                float phi = angle + radians(it);
                float2 _arcuv = float2(_BlurCenter.x + r * cos(phi), _BlurCenter.y + r * sin(phi));

                acumulateColor += tex2D(_MainTex, _arcuv);
            }

            return acumulateColor / _Iteration;
        }
這邊使用acos取角度,其性質如下
上層皮膚模擬
超音波圖之所以上面通常都是白白一絲一絲的,因為那是人的表層皮膚、肌肉,容易產生echo,所以偏白。 文獻[1]教了我們基本的超音波效果模擬,為了讓圖更逼真,所以再來多做一些吧。
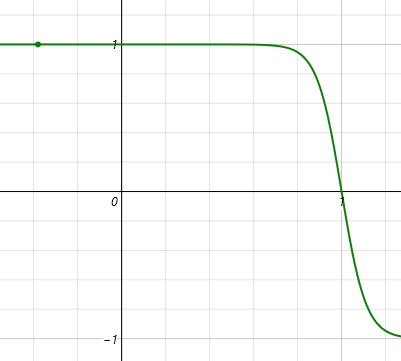
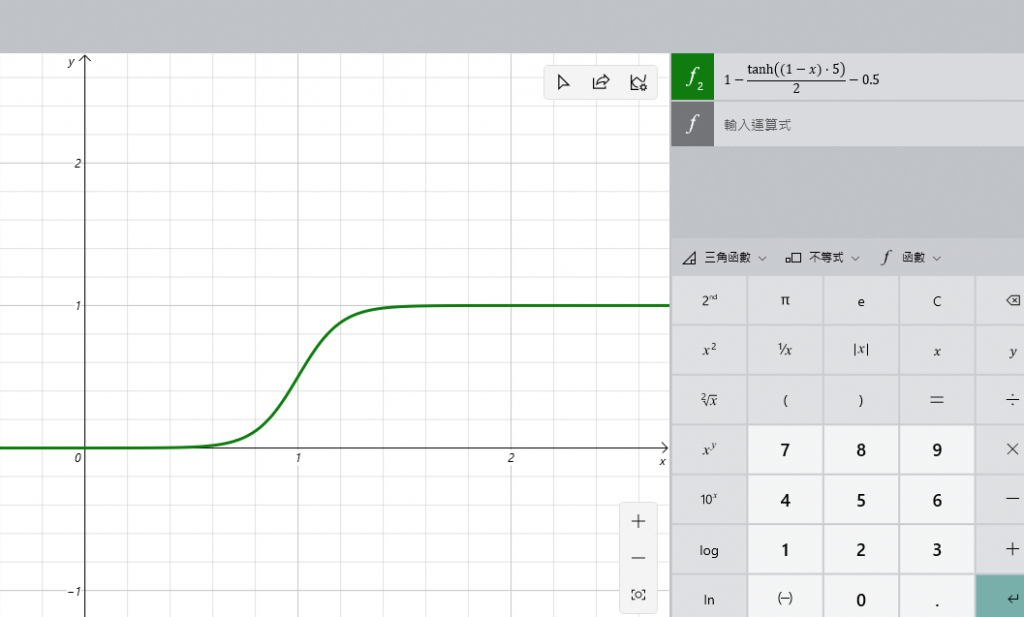
使用tanh取得上層偏白的遮罩,再調整一下參數可得到以下曲線:
float whiteIntensity = 1 - tanh((1 - input.uv.y) * 9);
搭配雜訊貼圖可得到以下效果:
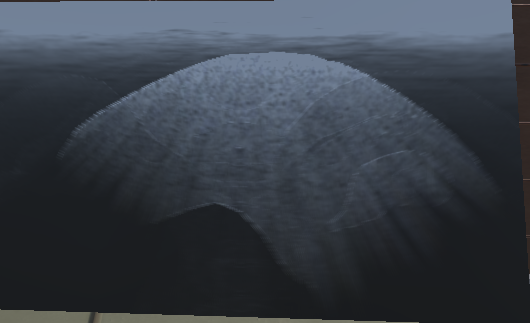
再調整一下曲線讓他不要太白:

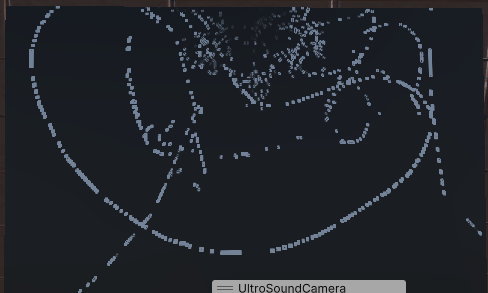
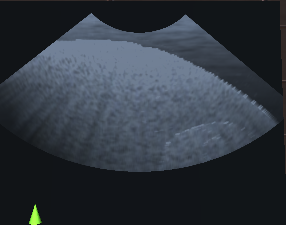
扇型裁切
我們需要的是右邊這種形狀的,需再加點角度範圍判斷。


half4 frag(v2f i) : SV_Target
            {
                //Re-map this now rather than later
                float2 pos = - (i.uv * 2.0 - 1.0);

                //Calculate the angle of our current pixel around the circle
                float theta = degrees(atan2(pos.x, pos.y)) + 180.0;

                //Get circle and sector masks
                float circle = length(pos) <= 1.0 && length(pos) >=_innerDistance;
                float sector = (theta <= _EndAngle) && (theta >= _StartAngle);

                //Return the desired colour masked by the circle and sector
                return _Color * (circle * sector);
            }
結果:
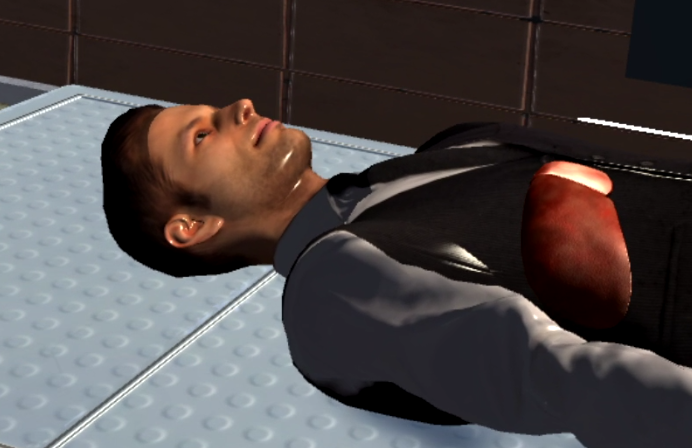
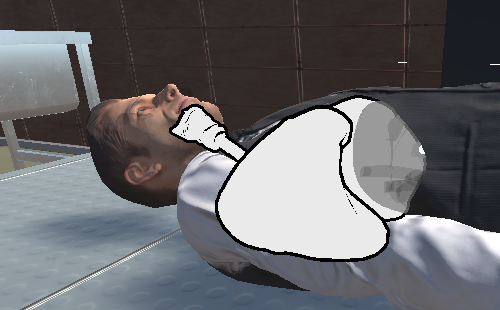
內臟透視
為了讓使用者能知道內臟的位置,本專案提供透視選項,能讓指定內臟顯示於最上層。 這邊嘗試了(1)Stencil masking 與(2)雙Pass覆寫深度 兩種作法。
Stencil masking
利用Stencil 遮罩將特定部位的像素裁剪出來,並指定疊加顯示於畫面上。
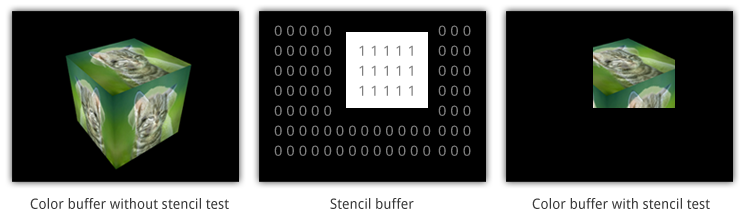
在人體等想被穿透的物體shader上加
Stencil
{
    Ref 1 // ReferenceValue = 1
    Comp NotEqual // Only render pixels whose reference value differs from the value in the buffer.
}
能穿透的物件shader加上
Stencil
{
    Ref 1 // ReferenceValue = 1
    Comp Always // Comparison Function - Make the stencil test always pass.
    Pass Replace // Write the reference value into the buffer.
}
缺點是只有PC能執行,由於Occulus是安卓系統,礙於該平台不支援,導致只會渲染在一顆眼睛上。
雙Pass覆寫深度
原理:
第一個pass無視深度條件寫入背面,同時也會寫下深度,讓深度能在它之上的只有自己的正面,因此讓第二個pass正常渲染即可。
Cull Front
ZTest Always
Shader "Unlit/OrganOutline"
{
    Properties
    {
        _MainTex ("Texture", 2D) = "white" { }
        _Color ("outline color", Color) = (1, 0, 0, 1)
        _OutlineWidth ("Outline width", Range(0.0, 1.0)) = .005
    }
    SubShader
    {
        Tags { "RenderType" = "Opaque" }
        LOD 100

        pass
        {
            Cull Front
            ZTest Always
            CGPROGRAM

            #pragma vertex vert
            #pragma fragment frag

            #include "UnityCG.cginc"
            float4 _Color;
            float _OutlineWidth = 0.5;

            struct v2f
            {
                float4 pos : SV_POSITION;
            };

            v2f vert(appdata_base v)
            {
                v2f o;
                float3 norm = normalize(v.normal);
                v.vertex.xyz += v.normal * _OutlineWidth;
                o.pos = UnityObjectToClipPos(v.vertex);

                return o;
            }
            fixed4 frag(v2f i) : COLOR
            {
                return _Color;
            }
            ENDCG

        }

        Pass
        {
            Cull Back
            //...... render your texture
        }
    }
}
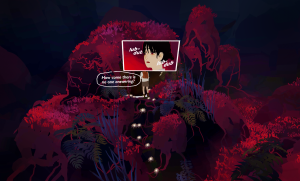
用戶操作
為了提升VR體驗,所以如影片中的感測器會自動貼合人體表面,防止穿模。
public LayerMask skinMeshLayer;

    [SerializeField]
    private Transform sensorPoint;

    [SerializeField]
    private float rayDistance = 10;

    private float stickLength;

    private void Start() {
        stickLength = (sensorPoint.position - transform.position).magnitude;
    }

    void Update()
    {
        Vector3 alignDir = (sensorPoint.position - transform.position).normalized;
        Vector3 _rayStart = transform.position -  alignDir*rayDistance ; //往後退保留ray空間

        RaycastHit hit;

        if (Physics.Raycast(_rayStart, alignDir, out hit, rayDistance * 2, skinMeshLayer))
        {
            Vector3 _stickPoint = hit.point;
            Vector3 _movePoint = _stickPoint - alignDir * stickLength;
            transform.position = _movePoint;
        }
        else {
            transform.localPosition = Vector3.zero;
        }

    }
總結
製作步驟整理如下:
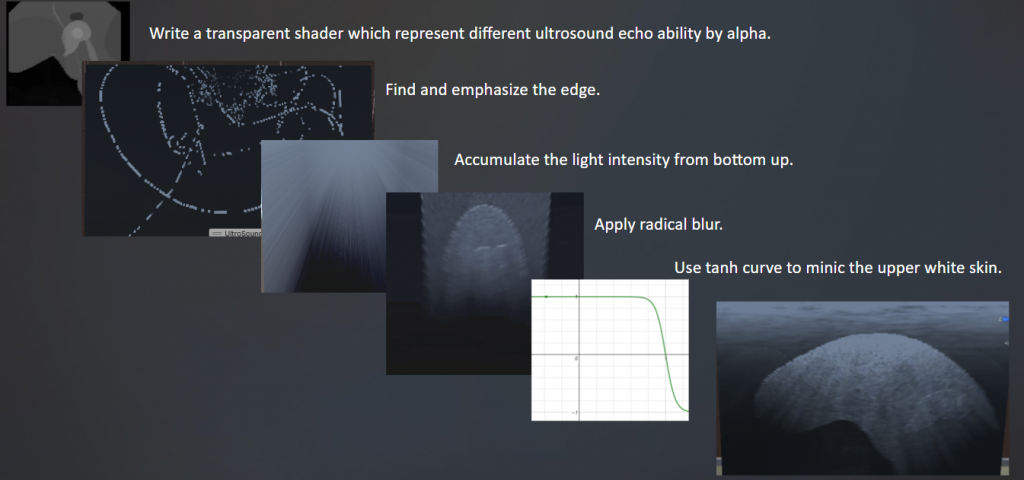
額外閱讀
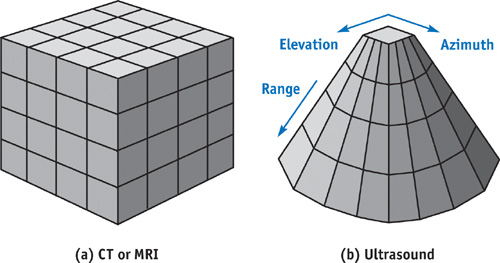
[5] 核磁共振是3D立體空間,而超聲波是建立在聲波網格(acoustic grid),渲染比較困難。
[6] 快速剖面演算法。 (因為超音波是取截面)
[7] 更專業的演算法。
參考文獻
- Ultrasound simulation with shaders – Avangarde-Software
- Barnouin, C., Zara, F., & Jaillet, F. (2020, February). A real-time ultrasound rendering with model-based tissue deformation for needle insertion. In 15th International Conference on Computer Graphics Theory and Applications, GRAPP 2020. [pdf]
- How to draw circular sector in RunTime? – Unity Answers
- unity – How can I create a “see behind walls” effect? – Game Development Stack Exchange
- Chapter 40. Applying Real-Time Shading to 3D Ultrasound Visualization | NVIDIA Developer
- https://www.scitepress.org/papers/2017/60972/60972.pdf
- GPU Ultrasound Simulation and Volume Reconstruction (tum.de)