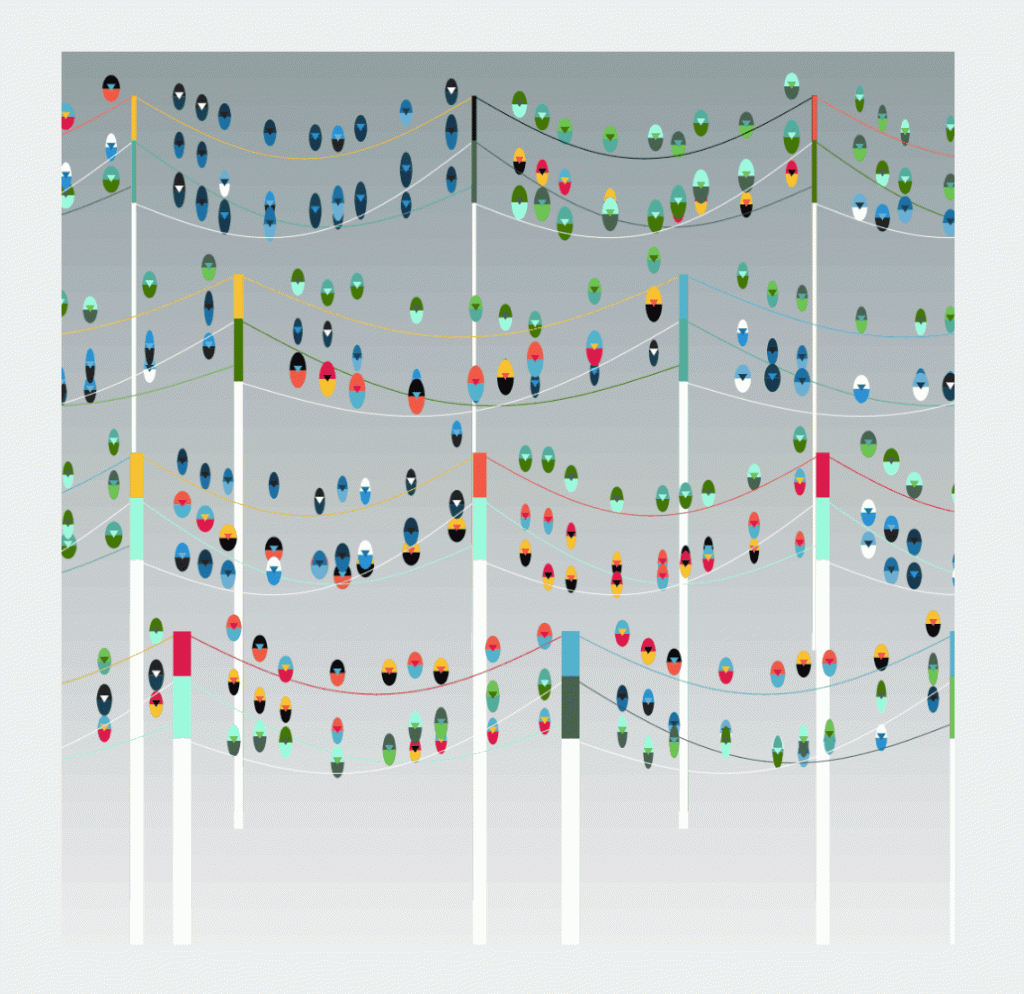
今天我們要來做的作品《鳥與電線桿》,可以分為三個項目,分別是鳥、電線桿以及顏色的設計。上圖的完成品,不管是鳥或是電線桿,它們看上去都有規律性,但是彼此之間又同時帶有一些差異性,像是每一隻鳥的大小以及所站的位置等,而電線桿則因為前後粗度不一樣以及每條左右的高度不同而形成交錯感。
透過此次互動藝術創作教學,你會學到
- 如何透過建立 class 的方式,讓我們可以一次新增多個相同的物件
- 透過參數設定,讓每個所產生的物件有不一樣的形體變化
- 透過將背景顏色參數化的設定,製作出不同作品的效果
在開始製作電線桿之前你該知道的p5.js與 原生 js 小技巧
- class 與 constructor : 要建立物件就必須使用到 class,一般來說在 class 中會搭配另一個關鍵字 constructor,這代表建構子,有了它就可以初始化一個新的物件。
- lerp : 用於計算出兩個數值之間的相對比例的值,在本範例中用於繪製電線桿的線以及鳥的位置上,還有在後續製作漸層背景顏色時也會使用到相同的概念。
- push() / pop() 保存與還原畫布的狀態(可以參考老闆互動藝術程式創作入門的課程筆記:章節 7 進階繪圖 – 畫布操作與編織複雜圖形 (pop/push 的圖解))
- Object.assign : 原生 js,用於物件的值指定給另一個物件。
- push: 原生 js,將生成的電線桿物件放進陣列當中。
❗由於這次的範例中老闆有使用到物件的概念,所以在檔案上分為兩個檔案 mysketch 與 tab2,在每段程式碼的最上方會標註這是屬於哪一個檔案的程式,提供同學們參考。
一、建立第一組電線桿
第一步驟是要畫一組電線桿,而電線桿可以細分為兩個物件,分別是電線桿的柱子以及連接兩根柱子之間的線,下面先從連接的曲線開始做起。
- 繪製弧線
在畫曲線前,首先定義兩邊電線桿的位置,分別是 leftPoint 與 rightPoint,接著在這兩位置之間切成十等分,並且需要知道每一等分的位置點。舉例來說,如果電線桿的兩個位置分別是 x1 = 0 與 X2 = 100,切成十等分就會得到一組座標為 [0, 10, 20, 30, ...,90, 100],這裡就要使用到 lerp ,它一共需要三個參數 (數字A,數字B,插值量),這可以依照插值量的大小來得到介於數字A與數字B比例的值,像是 [0, 100, 0.3] 就會是 30,而 [0, 100, 0.6] 則是 60,要注意的是插值量的值必須介於0.0 與1.0 之間。
有了各別點的位置後,接著就要讓每個點的位置移動一點位置,並將其連接起來形成弧線的效果,要做出向下弧線的效果可以加上 sin 值,透過觀察 sin 波可以發現從 0 到 π 的弧形是向下的,而 π 到 2π 的弧形是向上的,所以在 sin值中要取 0 到 π。
2. 加上電線桿
畫好曲線後,桿子相對比較簡單,就在兩邊的位置以 rect() 畫上寬 10,高度為 500 的長方形。在這裡可以將剛剛在曲線上用於辨識點位置的圓形註解起來,留下一條乾淨的弧線。
3. 加上滑鼠互動
建置好電線桿後,這裡可以來嘗試加上一點小小的互動,讓電線桿的左側位置是根據滑鼠的位置來決定,這樣一來在移動滑鼠時,電線桿的寬度也會跟著改變囉 ! 不過這裡要記得在前面加上 background(255),讓背景不斷更新,不然就會變成許多電線桿疊在一起的畫面。
// mysketch
function setup() {
  createCanvas(1000, 1000);
  background(255);
}

function draw() {
  // 3. 重置背景
  background(255)
  let leftPoint = createVector(50, 350)
  let rightPoint = createVector(800, 350)
  // 3. 加上滑鼠互動
  rightPoint.x = mouseX

  stroke(0)
  strokeWeight(5)
  noFill(0)
  // 1. 加上弧線
  beginShape()
  for (var i = 0; i <= 10; i++) {
    let midPoint = p5.Vector.lerp(leftPoint, rightPoint, i / 10)
    midPoint.y += sin(i / 10 * PI) * 60
    //鳥大概的位置
    //ellipse(midPoint.x, midPoint.y, 30)
    vertex(midPoint.x, midPoint.y)
  }
  endShape()

  // 2. 加上桿子
  fill(0)
  rect(leftPoint.x, leftPoint.y, 10, 500)
  rect(rightPoint.x, rightPoint.y, 10, 500)
}
二、建立物件形式
接著將電線桿包裝成 class,class就像是一種模板一樣,當把模板設定好後,我們就可以快速生成同樣的物件。
首先在 openprocessing 上面開一個新的 tab,在裡面開始撰寫 class。在openprocessing 中,不須要使用 import 的方式來引入其他的檔案,它就會自動幫我們引入,非常地方便。
1. 建立 constructor
在初始化時會使用到關鍵字 constructor ,並且帶入參數 args ,這可以讓我們設定每一個物件所要指定的特定值。而避免在建立物件時,有些屬性是沒有被傳入的,所以需要建立一個預設的數值 def。在 Object.assign(def, args) 中,如果使用者有特別設定,就會把使用者引入的參數 args 蓋到預設值 def 上,而 Object.assign(this, def) 則是在將客製化後的設定值蓋到這個物件本體 this 上。
- 建立 draw() 與 update()
每一個物件中會需要 draw() 與 update() 來繪製圖形,這裡將剛剛繪製第一個電線桿的相關內容複製到 draw 中,並在前後分別加入 push, pop ,避免每次畫完一個電線桿,畫布狀態會被影響。
// tab 2
class BirdBar {
  // 1. 建立 constructor
  constructor(args) {
    let def = {
      leftPoint: createVector(50, 350),
      rightPoint: createVector(50, 350),
    }
    Object.assign(def, args)
    Object.assign(this, def)
  }
  // 2. 建立 draw() 與 update()
  draw() {
    // 要用 push() pop() 包起來
    push()
      stroke(0)
      strokeWeight(5)
      noFill(0)
      beginShape()
      for (var i = 0; i <= 10; i++) {
        let midPoint = p5.Vector.lerp(this.leftPoint, this.rightPoint, i / 10)
        midPoint.y += sin(i / 10 * PI) * 60
        // ellipse(midPoint.x, midPoint.y, 30)
        vertex(midPoint.x, midPoint.y)
      }
      endShape()

      fill(0)
      rect(this.leftPoint.x, this.leftPoint.y, 10, 500)
      rect(this.rightPoint.x, this.rightPoint.y, 10, 500)
    pop()
  }
  update() {
  }
}
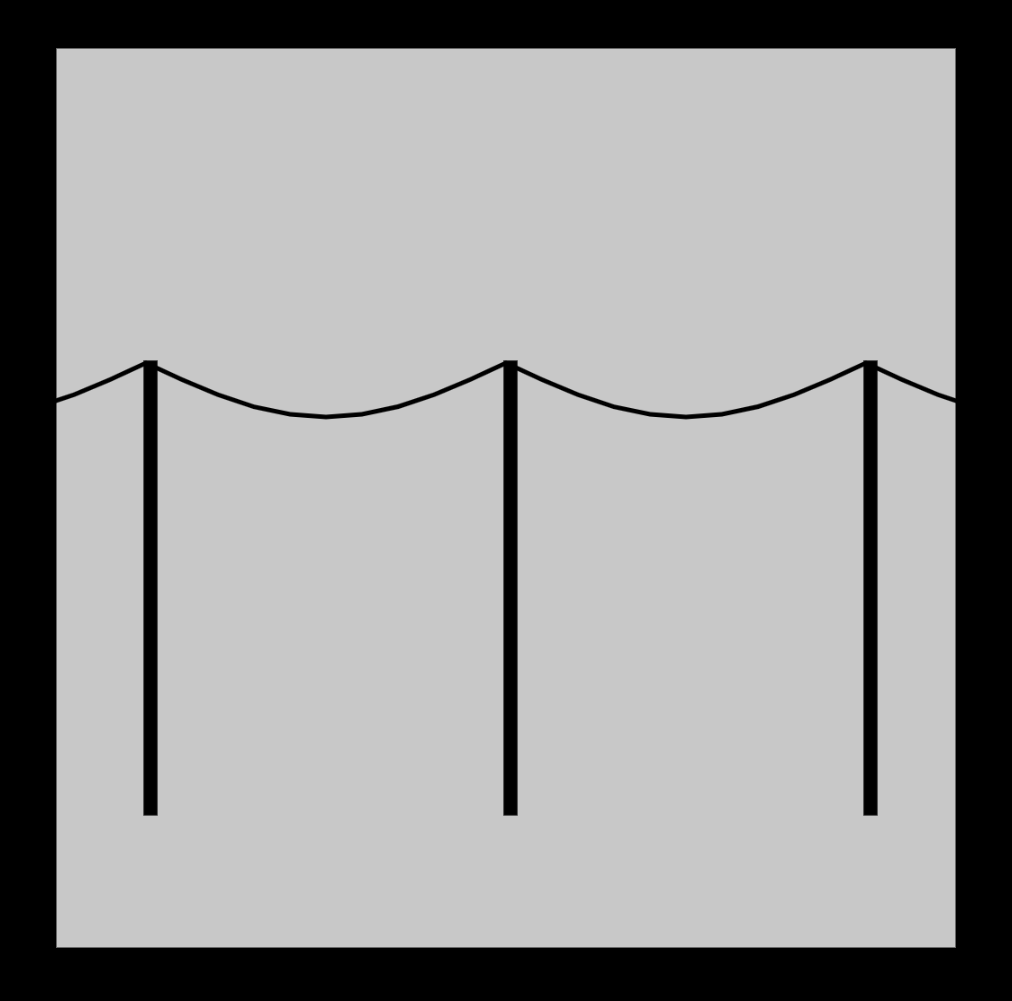
三、在主程式新增物件
在設定好模板後,就可以來到主程式來建立物件。由於是要一次建立好幾個電線桿,所以首先建立存放電線桿的陣列 birdBars,接著使用迴圈的方式建立五個電線桿,在這裡設定每個電線桿的左右間格為 400,而每個電線桿左側的起點位置為則是 -300 + 400 * i,可以注意到與 i 相乘的常數同為 400,與電線桿兩側的距離一樣,這樣才會形成所有的電線桿相連在一起的效果。
設定好參數後,再來在主程式的 draw 裡面透過 forEach 的方式呼叫每一個物件中的 draw 與 update,將圖形繪製出來。
// mysketch
let birdBars = []
function setup() {
  createCanvas(1000, 1000);
  background(0);
  for (var i = 0; i < 5; i++) {
    let startX = -300 + 400 * i
    birdBars.push(new BirdBar({
      leftPoint: createVector(startX, 350),
      rightPoint: createVector(startX + 400, 350),
    }))
  }
}

function draw() {
  fill(200)
  rect(0, 0, width, height)

  let leftPoint = createVector(50, 350)
  let rightPoint = createVector(800, 350)
  rightPoint.x = mouseX

  birdBars.forEach(bar => {
    bar.update()
    bar.draw()
  })
}
四、鳥兒站在電線桿上
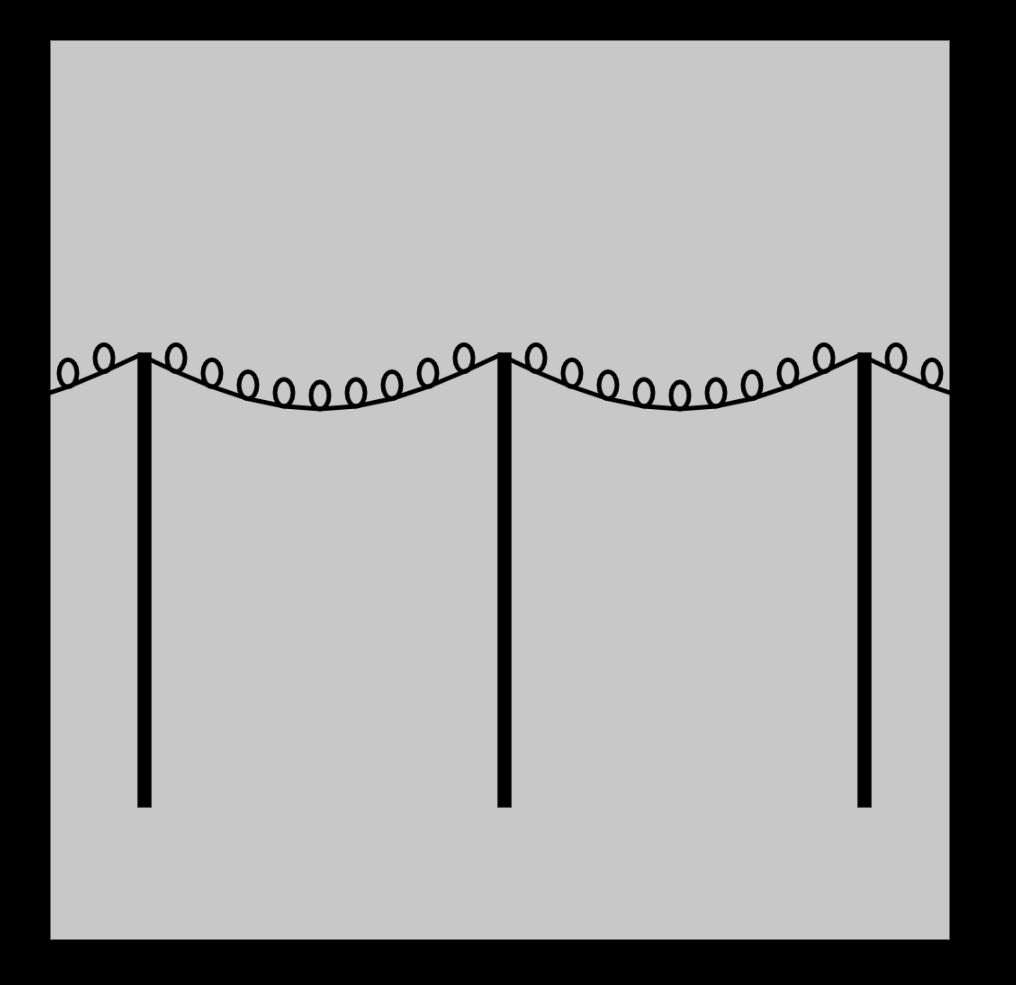
透過物件的方式完成了電線桿後,再來要加上鳥的形狀。這個步驟不困難,還記得在第一步驟的時候就已經畫出每一個點的圓形樣式了,在這裡只需要稍微做修改即可。
為了要讓鳥看起來是站在電線桿上的樣子,所以 y 的位置要向上移動高度 30 的一半,也就是 15,另外鳥也不太會站在電線桿上,所以要設定條件,如果是電線桿頭尾的話,不會繪製鳥兒。
// tab 2
  draw() {
    push()
      stroke(0)
      strokeWeight(5)
      noFill(0)
      beginShape()
      for (var i = 0; i <= 10; i++) {
        let midPoint = p5.Vector.lerp(this.leftPoint, this.rightPoint, i / 10)
        midPoint.y += sin(i / 10 * PI) * 60
        // 其實就是剛剛所畫的橢圓,但是鳥不會站在桿子上,所以要扣除掉頭尾
        if (i != 0 && i != 10) {
          ellipse(midPoint.x, midPoint.y - 15, 20, 30)
        }
        vertex(midPoint.x, midPoint.y)
      }
      endShape()

      fill(0)
      rect(this.leftPoint.x, this.leftPoint.y, 10, 500)
      rect(this.rightPoint.x, this.rightPoint.y, 10, 500)
    pop()
  }
五、為鳥添上顏色
老闆這裡一樣透過配色網站 coolors 來找尋配色的靈感,將網址中色票的部分複製進來,透過字串的處理後,變成可使用的顏色形式。在填色上老闆先以取於餘數的方式,讓五個顏色以規律方式依序呈現在鳥的身上,不過這時候會發現填色後的效果有點怪怪的,原因在於後面我們有把線條連起來,為了讓填色的效果是正常的,需要在這裡要加上 push()和pop() 將繪製鳥的地方包起來。
//tab 2
// 新增顏色
let colors = "0c090d-e01a4f-f15946-f9c22e-53b3cb".split("-").map(a => "#" + a)

class BirdBar {
  constructor(args) {
    ...
  }

  draw() {
    push()
      stroke(0)
      strokeWeight(5)
      noFill(0)
      beginShape()
      for (var i = 0; i <= 10; i++) {
        let midPoint = p5.Vector.lerp(this.leftPoint, this.rightPoint, i / 10)
        midPoint.y += sin(i / 10 * PI) * 60
        if (i != 0 && i != 10) {
          // 指定隨機顏色,並且使用 push() pop() 包起來
          push()
            noStroke()
            fill(colors[i % 5])
            ellipse(midPoint.x, midPoint.y - 15, 20, 30)
          pop()
        }

        vertex(midPoint.x, midPoint.y)
      }
      endShape()

      fill(0)
      rect(this.leftPoint.x, this.leftPoint.y, 10, 500)
      rect(this.rightPoint.x, this.rightPoint.y, 10, 500)
    pop()
  }
  update() {
  }
}
// mysketch
function draw() {
  // 更改背景顏色
  fill("#679dbf")
  rect(0, 0, width, height)
}
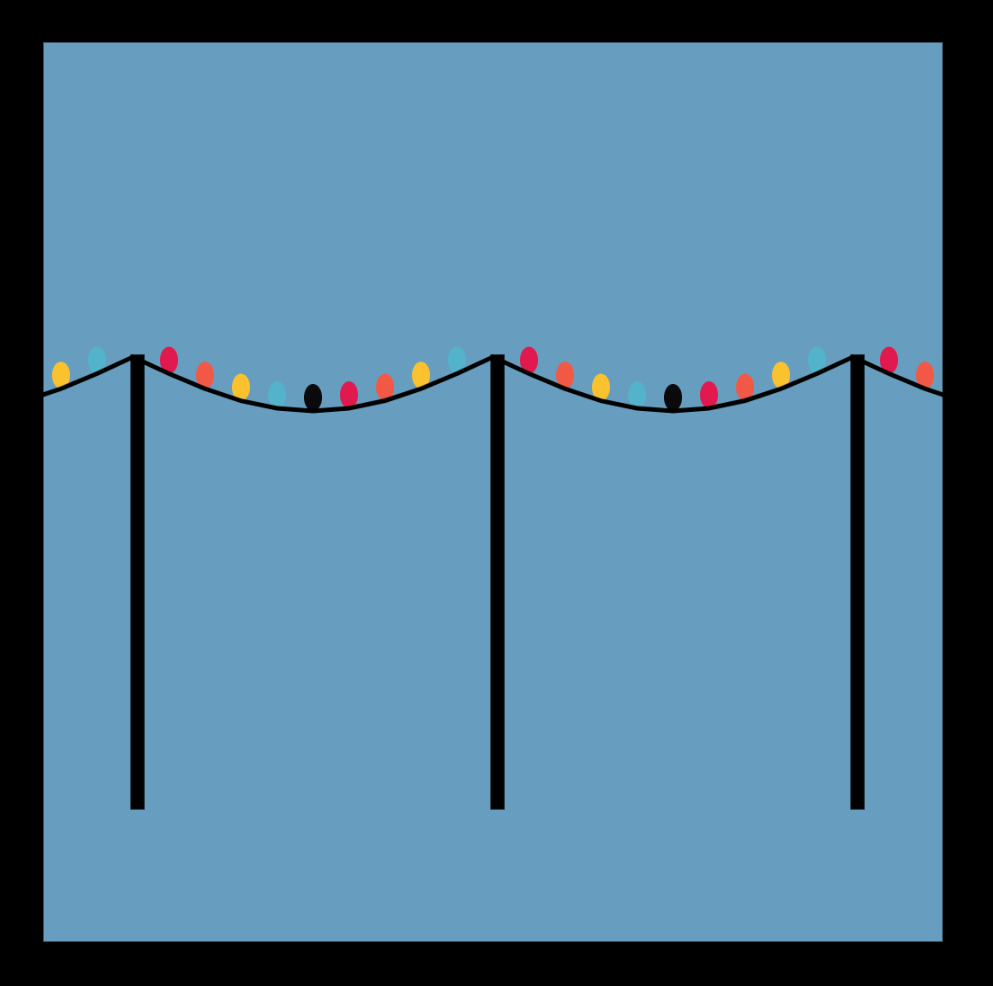
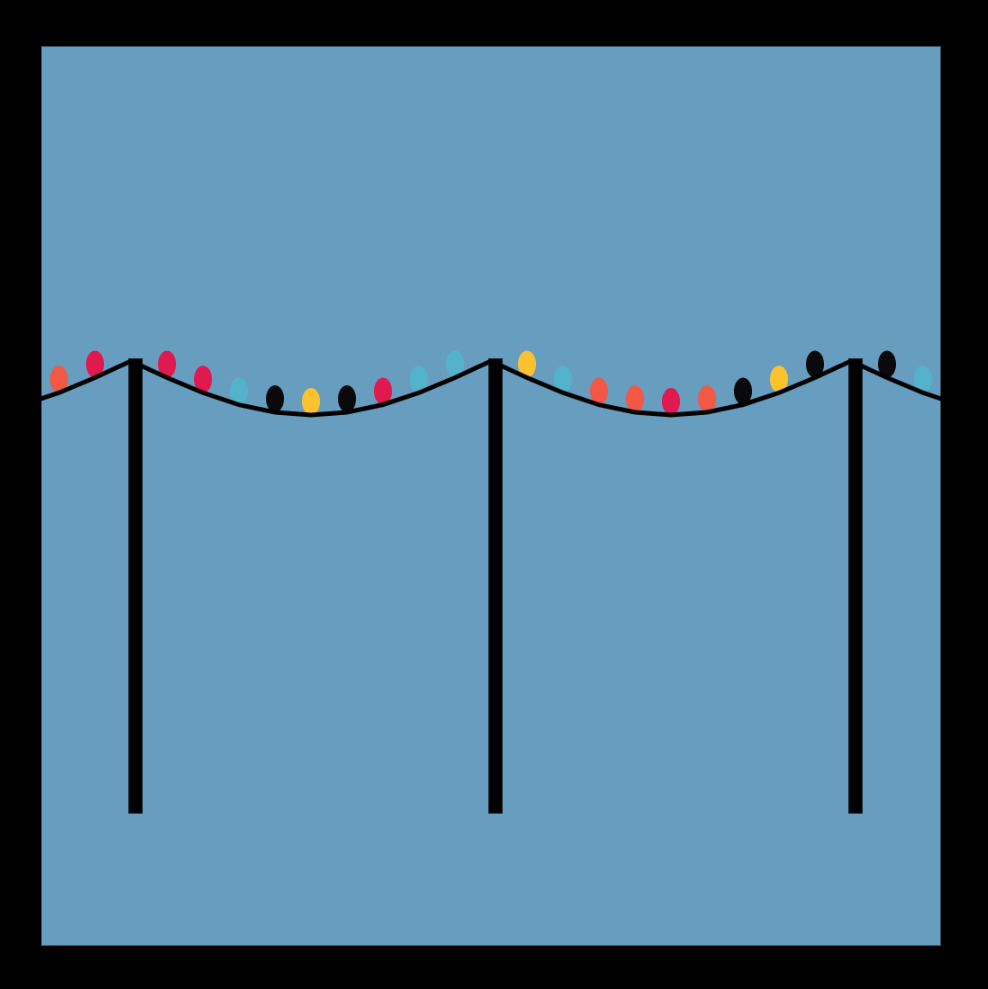
目前畫面上所看到的是依序排列的顏色,為了讓它有點變化,就讓顏色隨機呈現。說到隨機,你可能會想到使用 random,不過這裡無法使用的原因在於 draw 會一直不斷地執行,所以每一幀都會重新產生一組隨機的顏色,以至於畫面中的顏色是會不斷變化的。
在這裡我們要呼叫另一個與隨機也有相關的函式 noise,在 noise中,只要輸入一個固定的數值,那它出來的也會是一個固定的數值,不會變動,這樣一來就不會隨機跳動了。不過也因為這樣的特性,它看上去又再次呈現規律的樣子,原因是其中的 i 值都是固定的從 1~9,所以每一組電線桿的排列的顏色組合會是一樣的,在這裡可以透過在屬性上新增 randomId: random(100000),並加到 noise 當中,讓每一次所輸入的數值都是隨機不同的,這樣一來所輸出的數值也會形成隨機。
//tab 2
let def = {
  leftPoint: createVector(50, 350),
  rightPoint: createVector(50, 350),
  // 新增 randomId 增加顏色的隨機性
  randomId: random(100000)
}
//tab 2
if (i != 0 && i != 10) {
  push()
    noStroke()
    // fill(colors[i%5])
    // 以 noise 的方式來隨機取顏色,記得要加上 this.randomId
    let colorIndex = int(noise(i, this.randomId) * 20) % colors.length
    fill(colors[colorIndex])
    ellipse(midPoint.x, midPoint.y - 15, 20, 30)
  pop()
}
六、修正電線桿位置
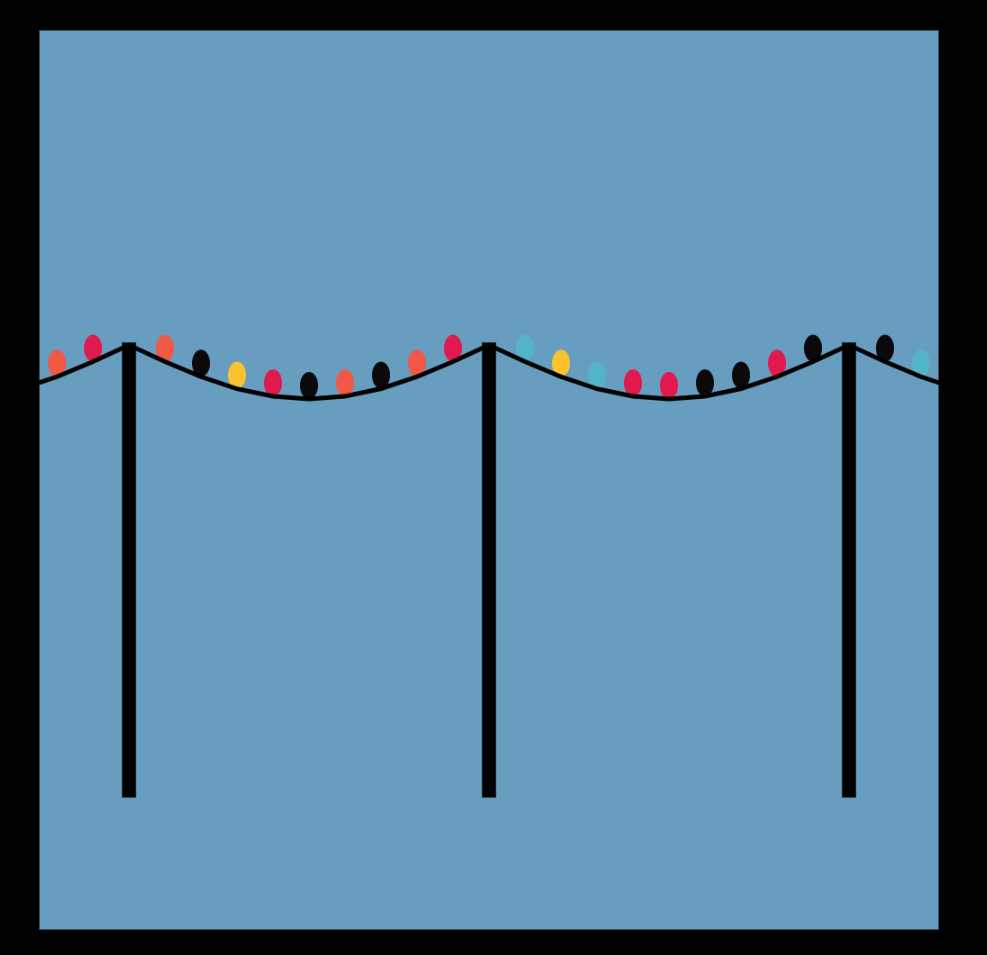
現在的接點有點怪怪的,因為 rectangle 是針對左上角來做繪製的,所以這裡要調整一下電線桿的位置,要將它往左移動自己一半的寬度。
另外也將電線桿的高度與寬度改以屬性的方式呈現,後續在新增其他組電線桿的時候會比較方便一些。
//tab 2
let def = {
  leftPoint: createVector(50, 350),
  rightPoint: createVector(50, 350),
  randomId: random(100000),
  // 將電線桿也同樣變成屬性
  barSize: createVector(10, 500)
}
//tab 2
// 減去電線桿寬度一半的長度 this.barSize.x / 2
rect(this.leftPoint.x - this.barSize.x / 2, this.leftPoint.y, this.barSize.x, this.barSize.y)
rect(this.rightPoint.x - this.barSize.x / 2, this.rightPoint.y, this.barSize.x, this.barSize.y)
七、做出不同組的電線桿
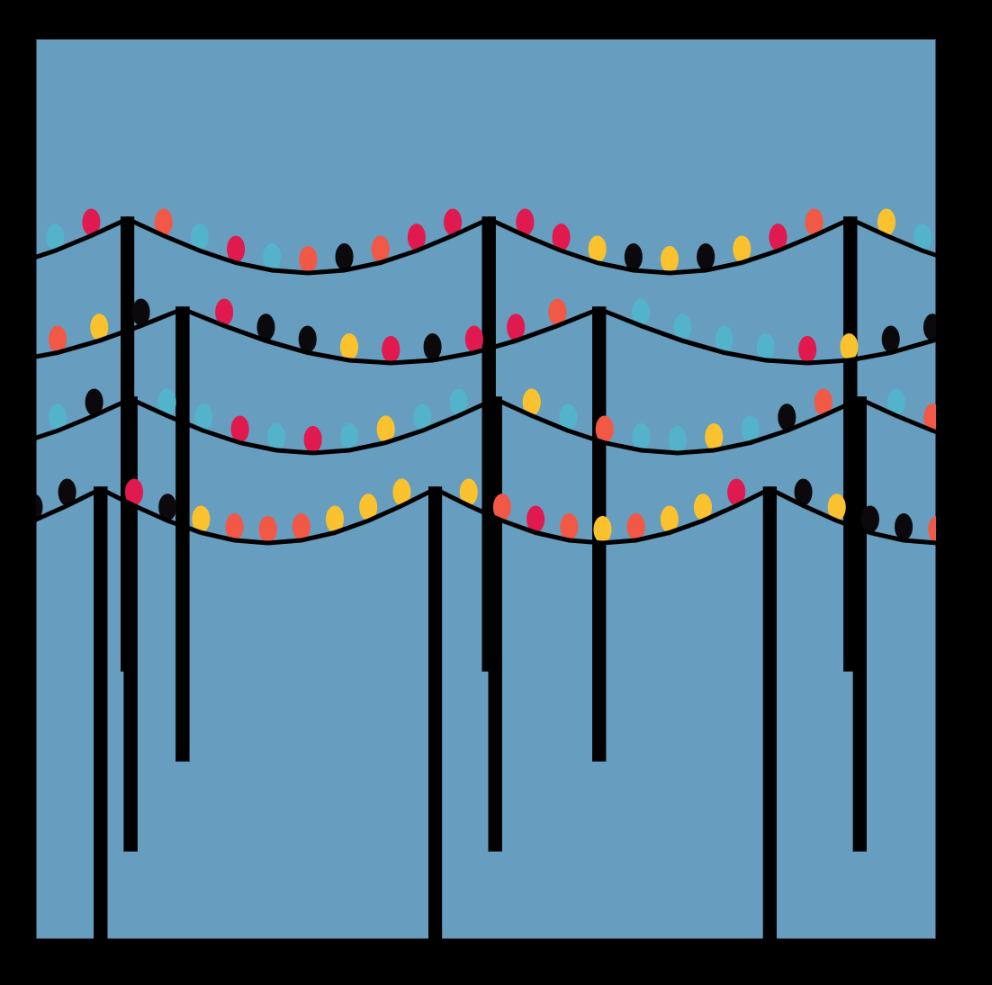
目前一組的電線桿已完成,接下來新增其他組的電線桿,老闆希望每一組的電線桿的寬度以及彼此之間的前後距離是不同,下面我們分成兩個步驟來實作。
- 電線桿不同的寬度
在第三步驟時,我們將電線桿彼此的寬度設定為 400,而現在則設定為一個隨機的寬度,使用 random 隨機產生 300 至 500 的數值並存至變數 barDist。
在先前的 startX 其值為 -300 + 400 * i,-300 所代表的為整排電線桿的起始位置,而 400 則代表每根電線桿的距離,i 表示是第幾根電線桿,所以這裡要將代表距離的 400 取代為 barDist。
// mysketch
function setup() {
  createCanvas(1000, 1000);
  background(0);
  // 新增變數  barDist
  let barDist = random(300, 500)
  for (var i = 0; i < 5; i++) {
    let startX = -300 + barDist * i
    birdBars.push(new BirdBar({
      leftPoint: createVector(startX, 350),
      rightPoint: createVector(startX + barDist, 350),
    }))
  }
}
2. 前後層距離不同
在前一個步驟設定寬度時是改變 X 的值,而要設定前後位置則是要改變 Y 的值,在外層再新增一層迴圈,並設定 startY = o * 100 + 200,這表示第一層的 Y 位置為 200,而每一層所間隔的距離為 100。
// mysketch
function setup() {
  createCanvas(1000, 1000);
  background(0);
  for (var o = 0; o < 4; o++) {
    let barDist = random(300, 500)
    // 垂直距離不一樣,所以新增 Y 的距離
    let startY = o * 100 + 200
    for (var i = 0; i < 5; i++) {
      let startX = -300 + barDist * i
      birdBars.push(new BirdBar({
        leftPoint: createVector(startX, startY),
        rightPoint: createVector(startX + barDist, startY),
      }))
    }
  }
}
八、製作漸層背景
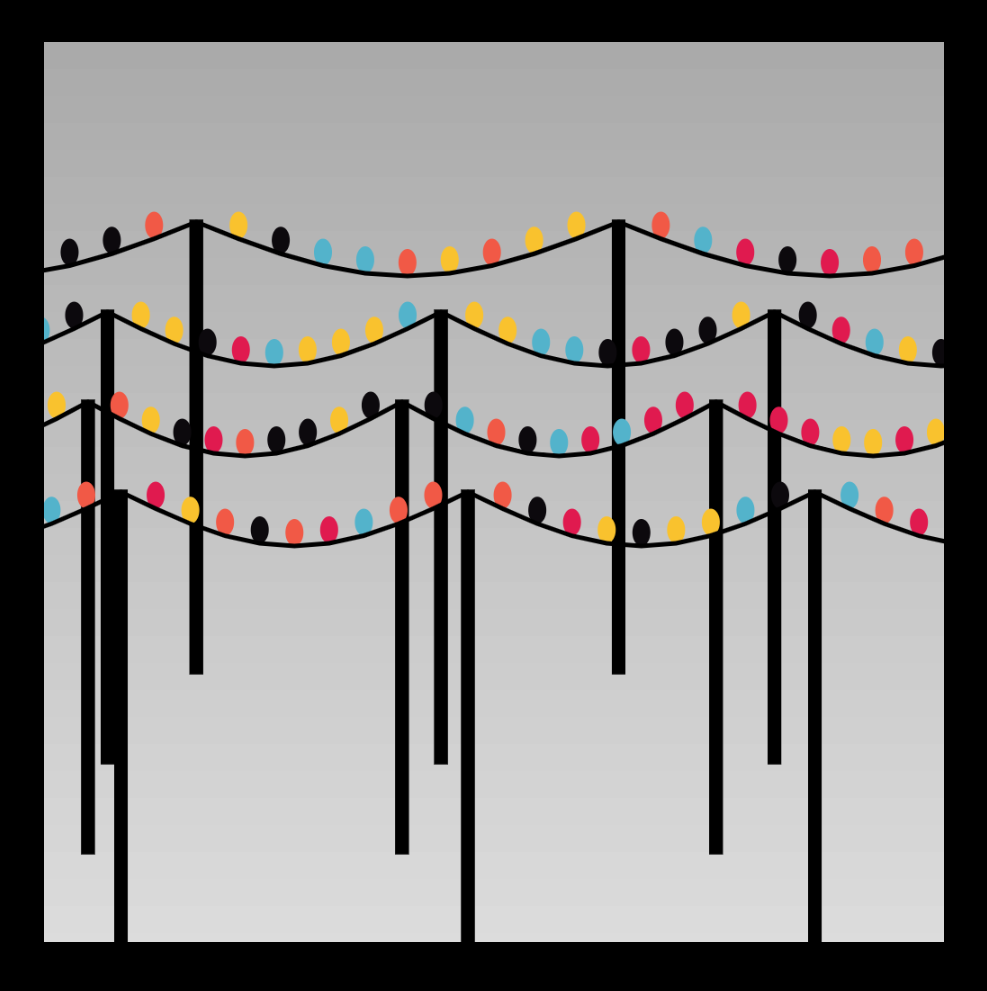
在 p5.js 中沒有可以直接繪製漸層的方式,不過我們可以透過好幾個方形來達成。先設定漸層兩邊的顏色,並命名為 startColor 與 endColor,這裡我們製作的是垂直方向的漸層,所以在外層 for 迴圈的數值範圍是 0~height,並以每 30 為單位繪製一個方形。
在顏色設定上使用了 lerpColor,它與一開始在畫電線桿所使用到的 lerp 概念上是一樣的,都是前兩個參數是給值 A 與 B ,而第三個參數則是給予一個插值,即可找到介於 A 與 B 之間插值比例的顏色。
// mysketch
// 新增漸層顏色
let startColor = color("#aaa")
let endColor = color("#ddd")

noStroke()
for (let y = 0; y < height; y += 30) {
  let currentColor = lerpColor(startColor, endColor, y / height)
  fill(currentColor)
  rect(0, y, width, 30)
}
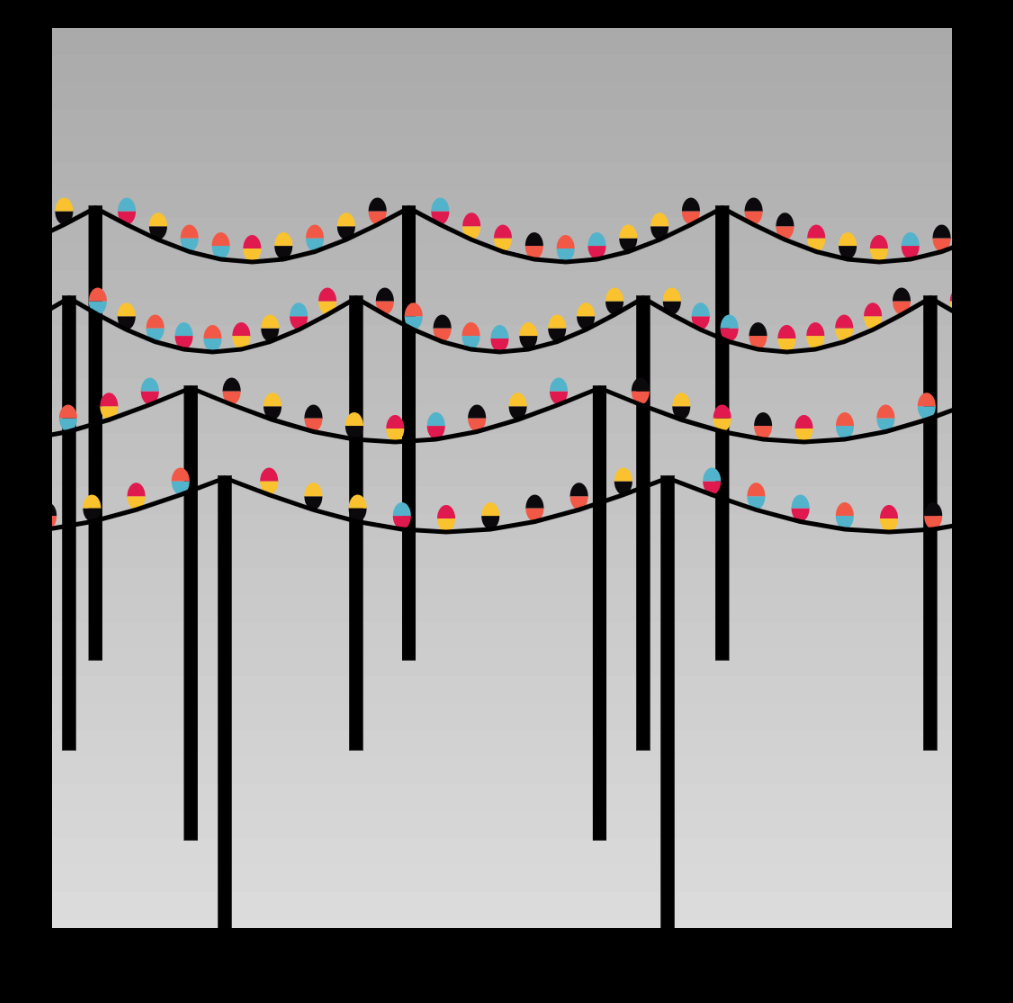
九、鳥
完成了背景之後,要精細製作主角「鳥」,這個步驟一共分為五個小節,先後針對了鳥的外觀、數量以及動態的呈現去做調整。
- 將身體上下拆分
老闆首先將鳥的身體從原本的橢圓形拆分成兩個半圓形,不過在重新繪製之前,為了方便圖形的定位,所以在畫每個點的位置之前,先將原點移動至先前繪製鳥身體中心的位置。
我們可以用 arc 來繪製半圓形,一共給定六個參數,最後兩個參數是指定角度的範圍,上半圓的範圍是 0~PI,而下半圓的範圍則是 PI~2 * PI,而因為剛剛已經 translate 座標位置了,在中心點的設定上皆為 (0, 0)。
//tab 2
if (i != 0 && i != 10) {
  push()
    // 移動中心點
    translate(midPoint.x, midPoint.y - 15)
    noStroke()
    // fill(colors[i%5])

    // 原本用橢圓畫,改為使用兩個半圓形畫
    let colorIndex = int(noise(i, this.randomId) * 20) % colors.length
    fill(colors[colorIndex])
    arc(0, 0, 20, 30, 0, PI)
    // 下半身建立另外一個隨機的顏色
    let colorIndex2 = int(3 + noise(i, this.randomId) * 20) % colors.length
    fill(colors[colorIndex2])
    arc(0, 0, 20, 30, PI, 2 * PI)
  pop()
}
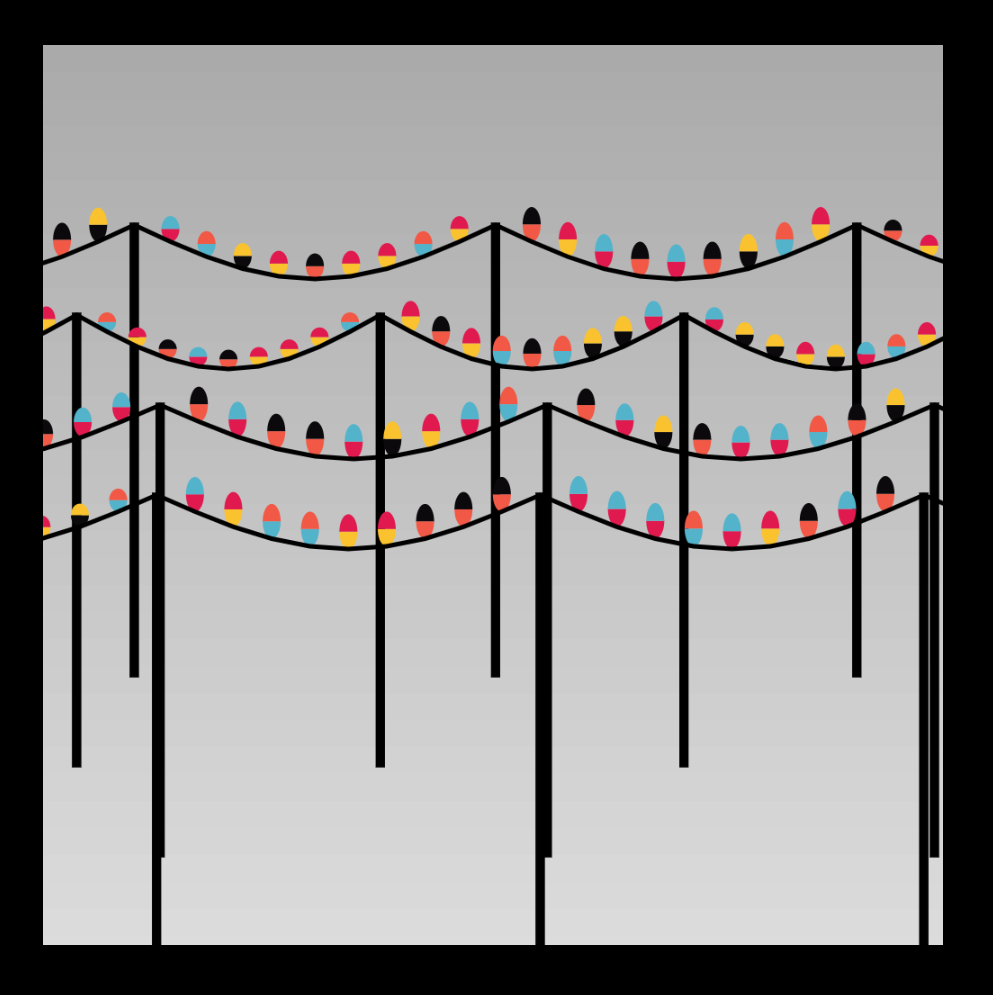
2. 設定鳥的隨機大小
在鳥的屬性值中新增 birdSize,代表鳥的大小,接著將與鳥身體大小有關的都改使用參數的方式呈現,第一個是中心點的位移,每隻鳥所要向上位移的量為自己身高的一半,所以要減去 this.birdSize.y / 2,而在繪製半圓形的身體中則改以 this.birdSize.x 與 this.birdSize.y 表示。
當上述都設定好後,在產生出鳥的物件時,就可以以 random 的方式產生出不同高度與寬度的鳥囉。
//tab 2
let def = {
  leftPoint: createVector(50, 350),
  rightPoint: createVector(50, 350),
  randomId: random(100000),
  barSize: createVector(5, 500),
  // 新增 birdSize 屬性
  birdSize: createVector(20, 30)
}
//tab 2
if (i != 0 && i != 10) {
  push()
    // 中心點 Y 軸移動改為參數
    translate(midPoint.x, midPoint.y - this.birdSize.y / 2)
    noStroke()
    // fill(colors[i%5])

    let colorIndex = int(noise(i, this.randomId) * 20) % colors.length
    fill(colors[colorIndex])
    // 身體大小改為參數
    arc(0, 0, this.birdSize.x, this.birdSize.y, 0, PI)
    let colorIndex2 = int(3 + noise(i, this.randomId) * 20) % colors.length
    fill(colors[colorIndex2])
    // 身體大小改為參數
    arc(0, 0, this.birdSize.x, this.birdSize.y, PI, 2 * PI)
  pop()
}
// mysketch
birdBars.push(new BirdBar({
  leftPoint: createVector(startX, startY),
  rightPoint: createVector(startX + barDist, startY),
  // 在設定好鳥大小的屬性後,便可以隨機指定鳥的大小
  birdSize: createVector(random(20, 20), random(20, 40))
}))
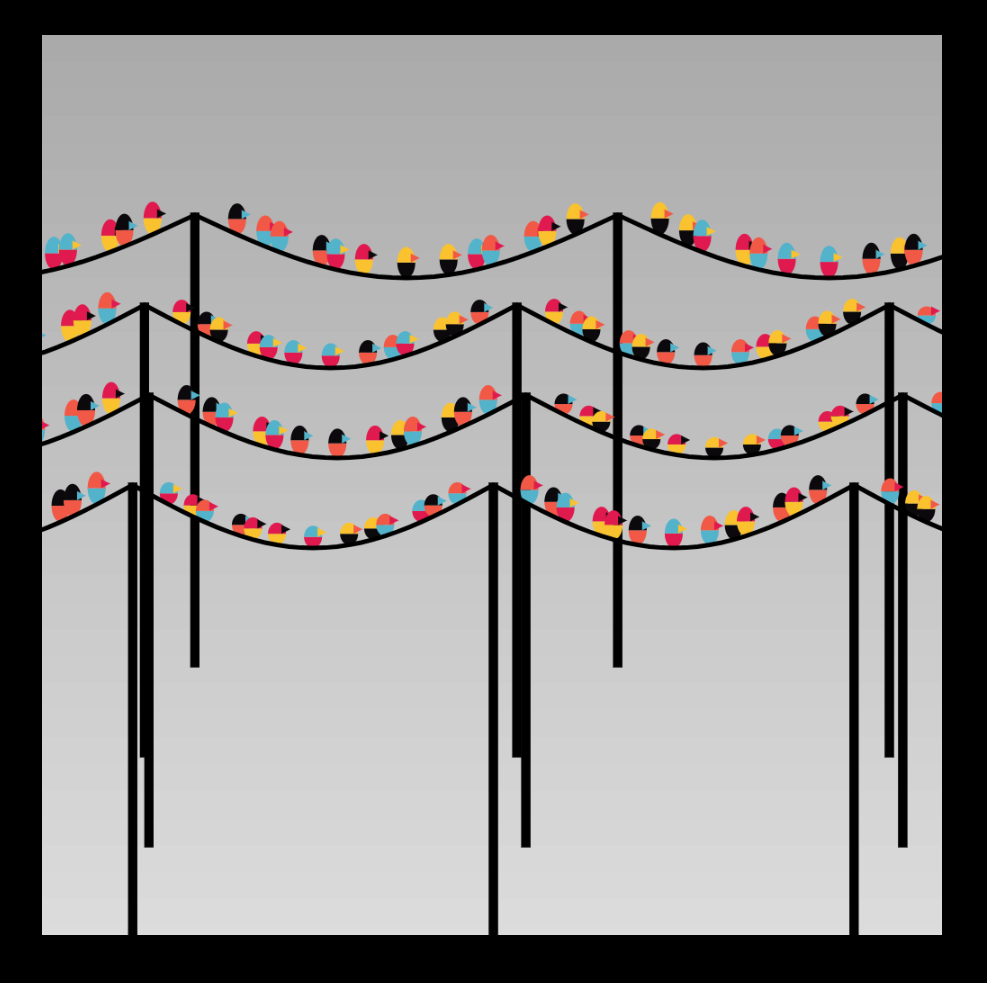
3. 畫鳥嘴
在畫鳥嘴前,一樣再新增一組隨機的顏色。老闆以三角形的方式來呈現鳥嘴的樣式,它一共需要六個參數,分別是三個點的 x 與 y 位置。
// tab 2
let colorIndex3 = int(2 + noise(i, this.randomId) * 20) % colors.length
fill(colors[colorIndex3])
translate(5, 0)
triangle(0, 0, 0, -10, 10, -5)
4. 改變鳥的數量與密集程度
先前在每條電線上是以規律的方式站了十隻鳥,在這裡要將鳥的數量改為變數的方式呈現,好讓鳥在數量的設定上會比較方便。建立一個計算鳥數量的變數 nodeCount,並且將與鳥數量的數值替換成變數。 另外在繪製鳥的條件下,除了頭與尾不畫鳥之外,老闆也設定了只有當 i 是 3 或 5 的倍數時才畫鳥,這樣一來會讓畫面更有錯落的感覺。
// tab 2
// 新增  nodeCount,並更換將常數都更換為變數 (總共4個地方要替換)
let nodeCount = 30
for (var i = 0; i <= nodeCount; i++) {
  let midPoint = p5.Vector.lerp(this.leftPoint, this.rightPoint, i / nodeCount)
  midPoint.y += sin(i / nodeCount * PI) * 70
  // 取 5 跟 3 的餘數,這樣會比較有錯落的感覺
  if (i != 0 && i != nodeCount && (i % 5 == 0 || i % 3 == 0)) {
    push()
      translate(midPoint.x, midPoint.y - this.birdSize.y / 2)
      noStroke()
      // fill(colors[i%5])
      let colorIndex = int(noise(i, this.randomId) * 20) % colors.length
      fill(colors[colorIndex])
      arc(0, 0, this.birdSize.x, this.birdSize.y, 0, PI)

      let colorIndex2 = int(3 + noise(i, this.randomId) * 20) % colors.length
      fill(colors[colorIndex2])
      arc(0, 0, this.birdSize.x, this.birdSize.y, PI, 2 * PI)

      let colorIndex3 = int(2 + noise(i, this.randomId) * 20) % colors.length
      fill(colors[colorIndex3])
      translate(5, 0)
      triangle(0, 0, 0, -10, 10, -5)
    pop()
  }

  vertex(midPoint.x, midPoint.y)
}
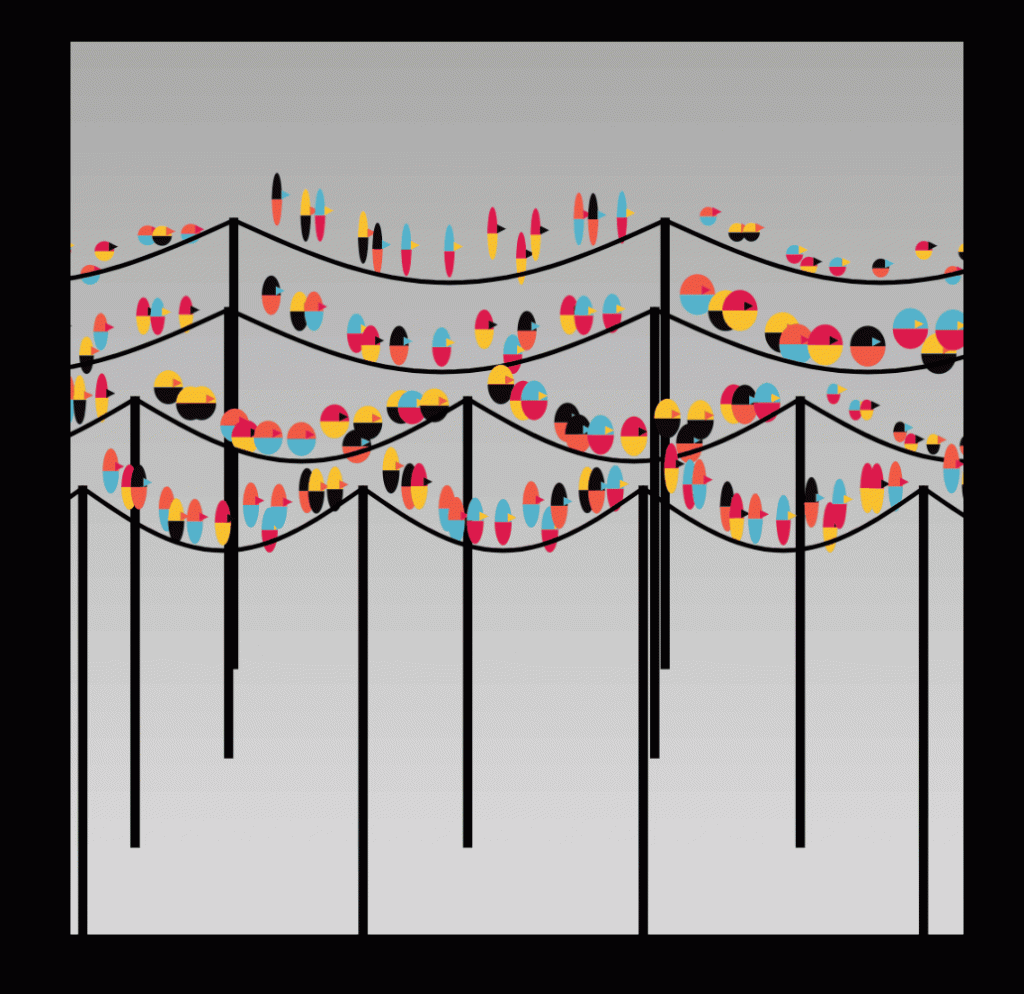
5. 鳥動態跳起
到這裡鳥的設定上差不多了,老闆這裡加上translate,並以 noise 的方式讓鳥以隨機的方式向上跳動。
// tab 2
translate(midPoint.x, midPoint.y - this.birdSize.y / 2)
translate(0, noise(i + frameCount / 50) * 50 - 30)
十、調整電桿感外觀
- 提升電線桿質感
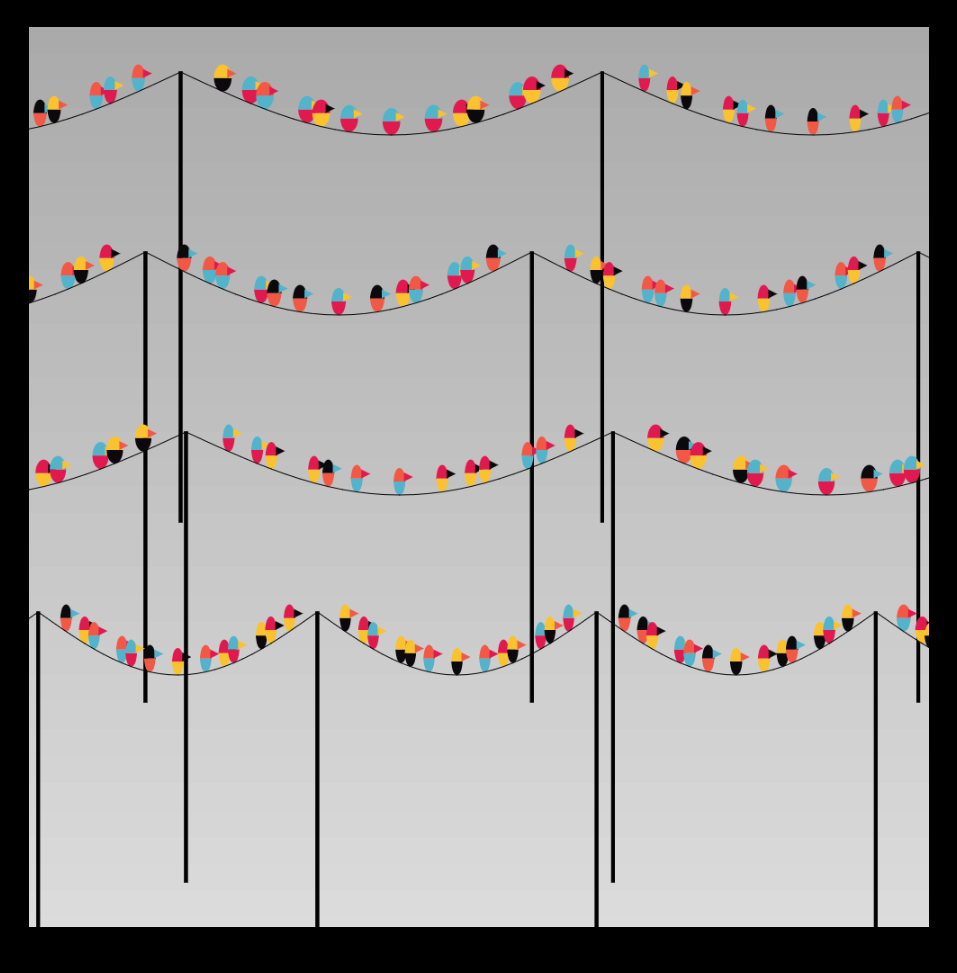
在開始調整之前,老闆先將剛剛所製作鳥跳動的效果註解起來,視覺上比較不會影響到我們的調整過程。首先將電線桿的寬度與線條的粗度 ( strokeWeight(1) )縮小之外,也將電線桿的間距都拉大,讓看上去的質感更加提升。
// tab 2
let def = {
  leftPoint: createVector(50, 350),
  rightPoint: createVector(50, 350),
  randomId: random(100000),
  // 將電線桿寬度調小
  barSize: createVector(3, 500),
  birdSize: createVector(20, 30)
}
// mysketch
let startY = o * 200 + 50
2. 新增多條電線
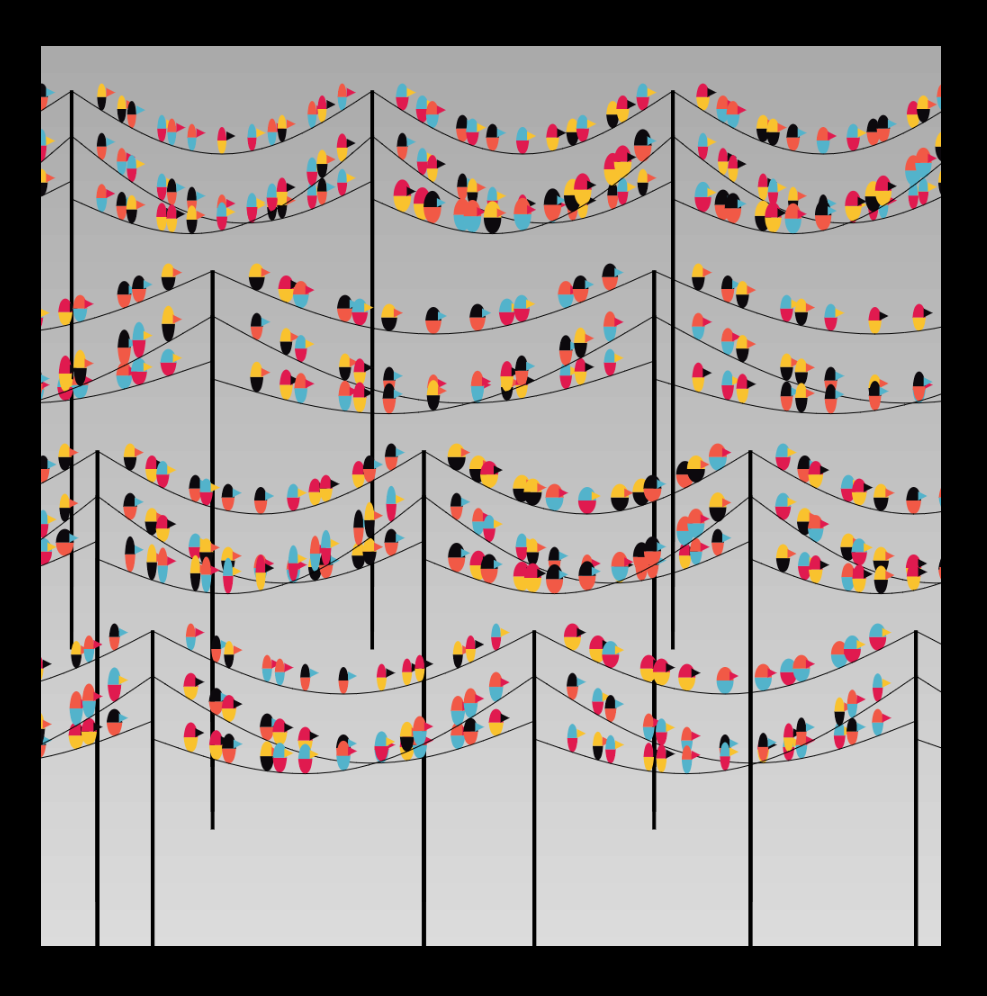
老闆在找實體電線桿參考圖的時候,注意到每根電線桿實際上彼此之間是有多條電線的,所以老闆決定再多增加兩條電線,可以直接複製第一組的程式後貼上,再微調參數。在決定上下高度的參數 y 上,第二組的電線桿左側加上 50,右側加上 100,而第三組則是左側增加 120 ,右側加上 50,這樣子形成高低與交錯的效果。
// mysketch
for (var i = 0; i < 5; i++) {
  let startX = -300 + barDist * i
  birdBars.push(new BirdBar({
    leftPoint: createVector(startX, startY),
    rightPoint: createVector(startX + barDist, startY),
    birdSize: createVector(random(10, 20), random(30, 30))
  }))
  // 新增其他組別的電線桿,左右兩測的高度不一樣,由低到高
  birdBars.push(new BirdBar({
    leftPoint: createVector(startX, startY + 50),
    rightPoint: createVector(startX + barDist, startY + 50 + 50),
    birdSize: createVector(random(10, 20), random(30, 30))
  }))
  // 新增其他組別的電線桿,左右兩測的高度不一樣,由高到低
  birdBars.push(new BirdBar({
    leftPoint: createVector(startX, startY + 120),
    rightPoint: createVector(startX + barDist, startY + 50),
    birdSize: createVector(random(10, 20), random(30, 40))
  }))
}
十一、新增與調整顏色
- 多彩的鳥
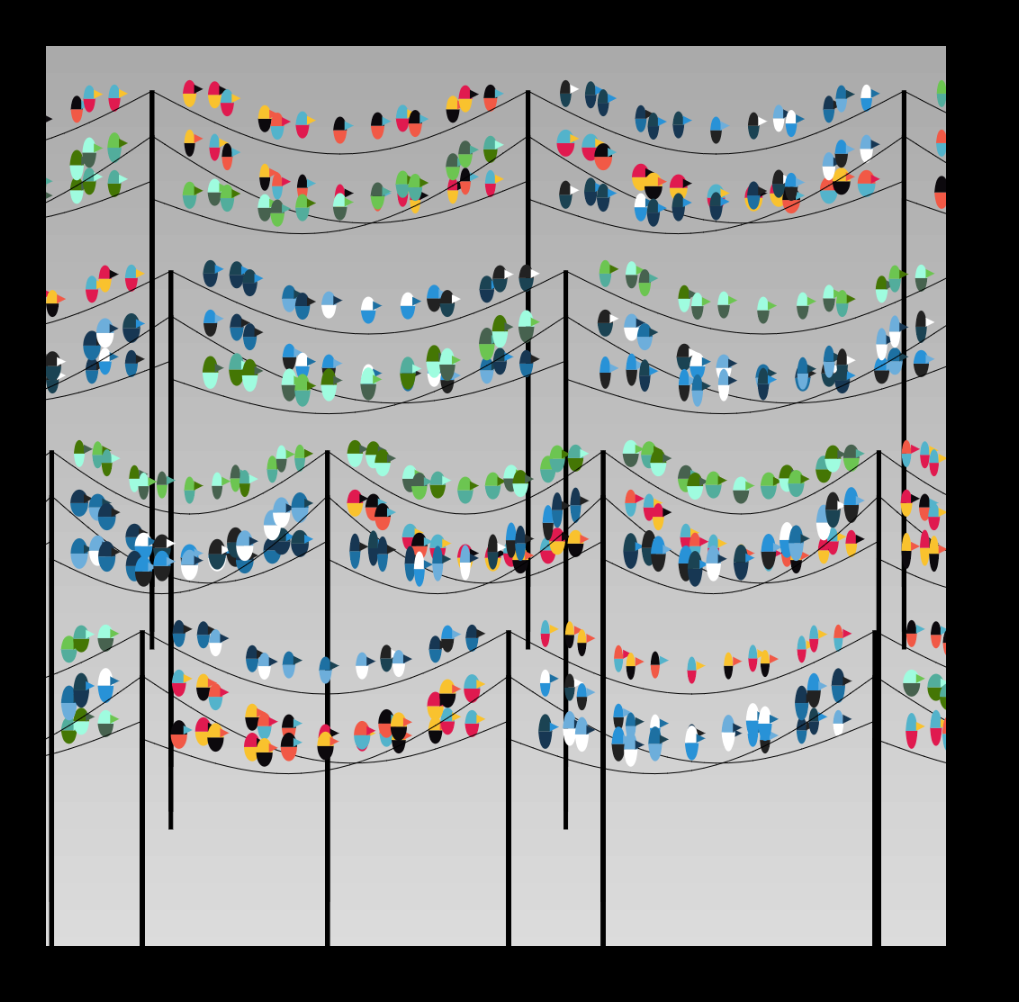
接著要來替剛剛所增加的鳥填上不同的顏色。老闆一樣至配色網站 coolors 找合適的配色組合。接著在屬性上新增屬性 colors ,預設值設定為黑色。設定好後就可以在生成鳥的物件時候,以 random 隨機選取三組顏色方式來讓鳥有不同的色彩組合。
// tab 2
let colors1 = "0c090d-e01a4f-f15946-f9c22e-53b3cb".split("-").map(a => "#" + a)
let colors2 = "447604-6cc551-9ffcdf-52ad9c-47624f".split("-").map(a => "#" + a)
let colors3 = "173753-6daedb-2892d7-1b4353-1d70a2-fff-222".split("-").map(a => "#" + a)

let def = {
  leftPoint: createVector(50, 350),
  rightPoint: createVector(50, 350),
  randomId: random(100000),
  barSize: createVector(4, 500),
  birdSize: createVector(20, 30),
  // 新增預設顏色
  colors: ["#000"]
}
// mysketch
for (var i = 0; i < 5; i++) {
  let startX = -300 + barDist * i
  birdBars.push(new BirdBar({
    leftPoint: createVector(startX, startY),
    rightPoint: createVector(startX + barDist, startY),
    // random 三組顏色,下面兩個也是一樣
    colors: random([colors1, colors2, colors3]),
    birdSize: createVector(random(10, 20), random(30, 30))
  }))
  birdBars.push(new BirdBar({
    leftPoint: createVector(startX, startY + 50),
    rightPoint: createVector(startX + barDist, startY + 50 + 50),
    colors: random([colors1, colors2, colors3]),
    birdSize: createVector(random(10, 20), random(30, 30))
  }))
  birdBars.push(new BirdBar({
    leftPoint: createVector(startX, startY + 120),
    rightPoint: createVector(startX + barDist, startY + 50),
    colors: random([colors1, colors2, colors3]),
    birdSize: createVector(random(10, 20), random(30, 40))
  }))
}
2. 黑暗模式
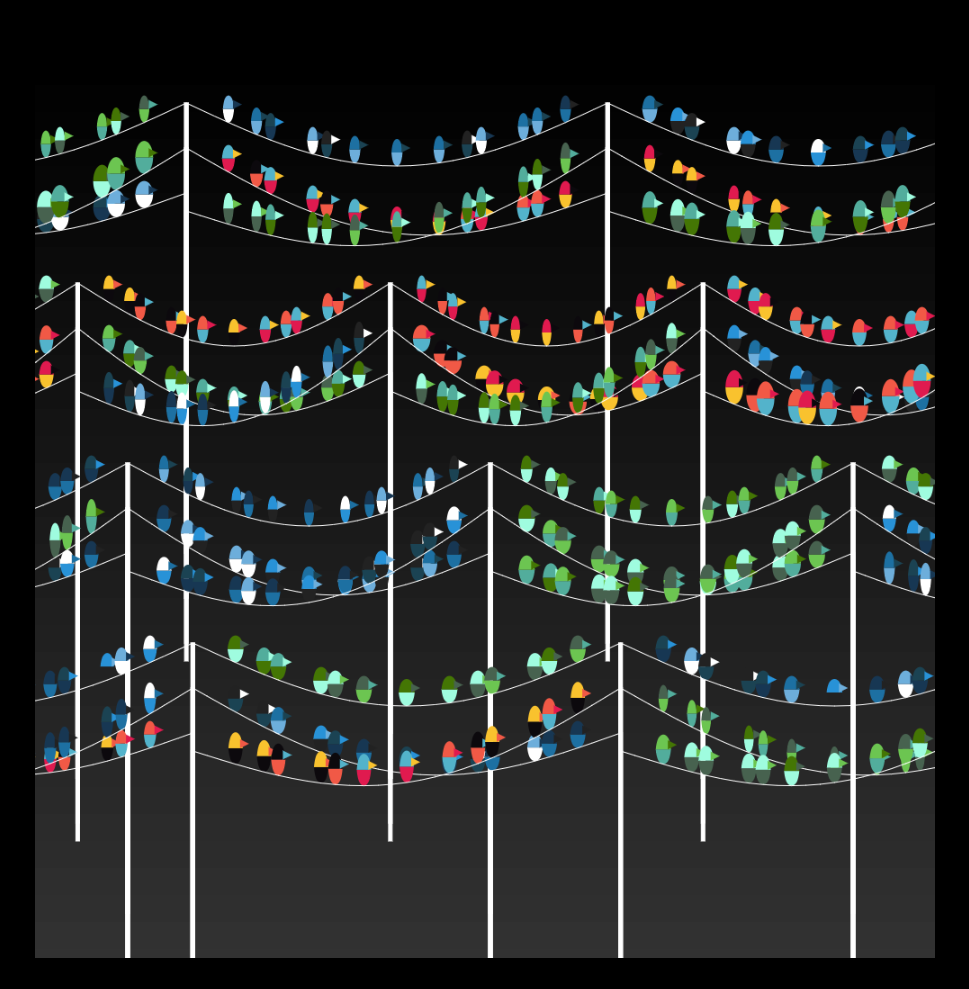
這裡老闆來嘗試看看如果是背景黑色,而電線桿是白色的話效果如何,結果效果意外地不錯。電線桿的部分新增電線顏色的屬性,並且分別加在電線桿與電線上。
// mysketch
// 將背景改為黑色
let startColor = color("#000")
let endColor = color("#333")
// tab 2
let def = {
  leftPoint: createVector(50, 350),
  rightPoint: createVector(50, 350),
  randomId: random(100000),
  barSize: createVector(4, 500),
  birdSize: createVector(20, 30),
  colors: ["#000"],
  // 新增電線桿顏色
  barColor: color(255)
}

// 更改電線顏色
stroke(this.barColor)
strokeWeight(1)
noFill(0)
beginShape()
let nodeCount = 30
for (var i = 0; i <= nodeCount; i++) {...}


// 更改電線桿顏色
fill(this.barColor)
rect(this.leftPoint.x - this.barSize.x / 2, this.leftPoint.y, this.barSize.x, this.barSize.y)
rect(this.rightPoint.x - this.barSize.x / 2, this.rightPoint.y, this.barSize.x, this.barSize.y)
十二、調整鳥的細節
- 跳動方式
將之前鳥跳動的設定打開,由於現在在 noise 的參數中只給第幾個 i 以及時間參數 frameCount,所以會發現當它跨不同組的時侯,上下擺動的頻率會是一樣的,這裡可以使用到之前為了製造隨機顏色所創建 randomId,將它加到 noise 之中。
// tab 2
translate(0, noise(i + frameCount / 50, this.randomId) * 50 - 30)
2. 改變鳥嘴方向
老闆在這裡有曾嘗試過替鳥加上眼睛,不過效果不是很好,所以後來就拿掉了。除了眼睛外,老闆這裡調整了嘴巴的位置,讓它以置中的方式呈現。
// tab 2
translate(0, -5)
triangle(-5, 0, 0, 8, 5, 0)
3. 調整鳥的密集程度
現在看上去鳥的數量上有點多,所以將取餘數的數值加大,降低鳥的密集程度。
// tab 2
if (i != 0 && i != nodeCount && (i % 6 == 0 || i % 4 == 0)) {...}
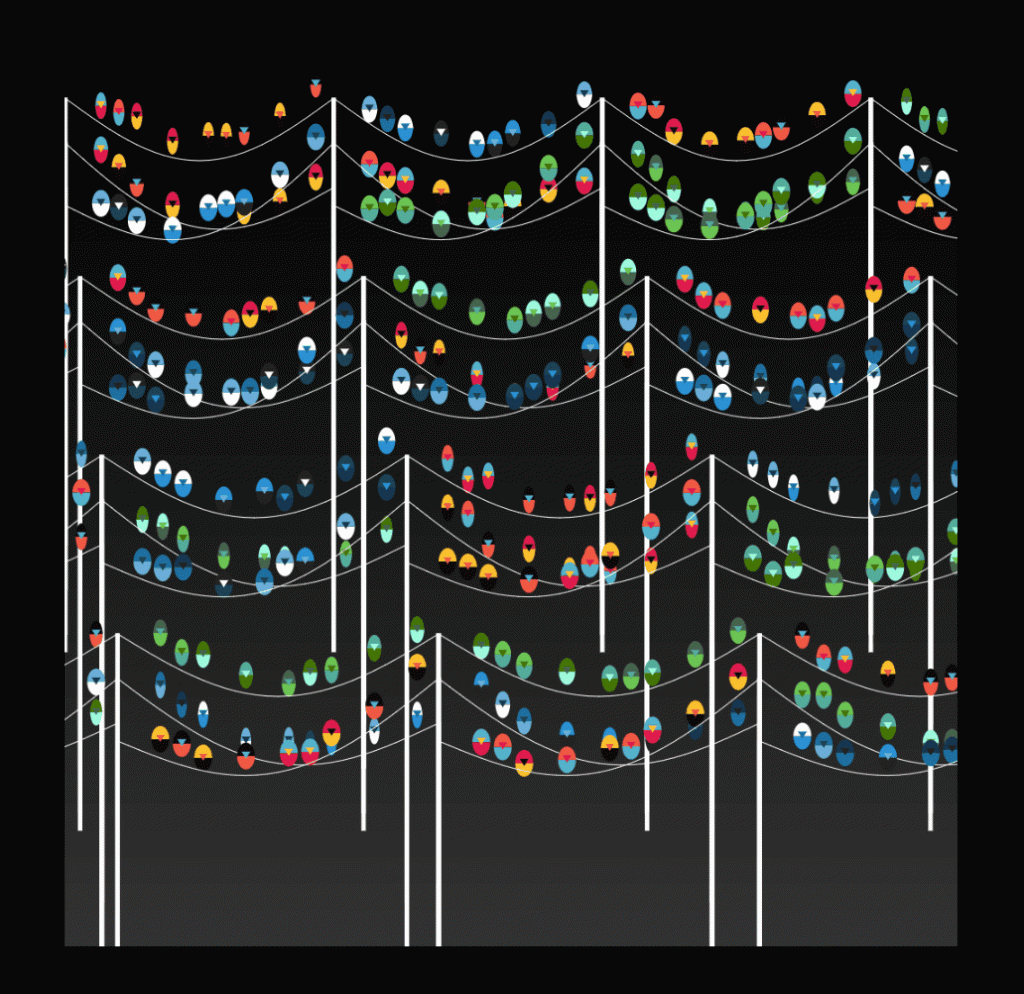
十三、調整電線桿顏色與背景色
為了不讓畫面上看起來那麼的單調,老闆從兩個地方著手,第一是改變每一組電線桿的顏色,以隨機的方式指定顏色,另一個則是指定背景顏色,讓作品的主體可以呈現出來。
// mysketch
//  2. 調整背景顏色
background(255);
for (var o = 0; o < 4; o++) {
  let barDist = random(300, 500)
  let startY = o * 200 + 50
  for (var i = 0; i < 5; i++) {
    let startX = -300 + barDist * i
    birdBars.push(new BirdBar({
      leftPoint: createVector(startX, startY),
      rightPoint: createVector(startX + barDist, startY),
      colors: random([colors1, colors2, colors3]),
      birdSize: createVector(random(10, 20), random(30, 30)),
      // 1. 隨機取電線桿的顏色
      barColor: random(colors1)
    }))
    birdBars.push(new BirdBar({
      leftPoint: createVector(startX, startY + 50),
      rightPoint: createVector(startX + barDist, startY + 50 + 50),
      colors: random([colors1, colors2, colors3]),
      birdSize: createVector(random(10, 20), random(30, 30)),
      // 隨機取電線桿的顏色
      barColor: random(colors2)
    }))
    birdBars.push(new BirdBar({
      leftPoint: createVector(startX, startY + 120),
      rightPoint: createVector(startX + barDist, startY + 50),
      colors: random([colors1, colors2, colors3]),
      birdSize: createVector(random(10, 20), random(30, 40))
    }))
  }
}
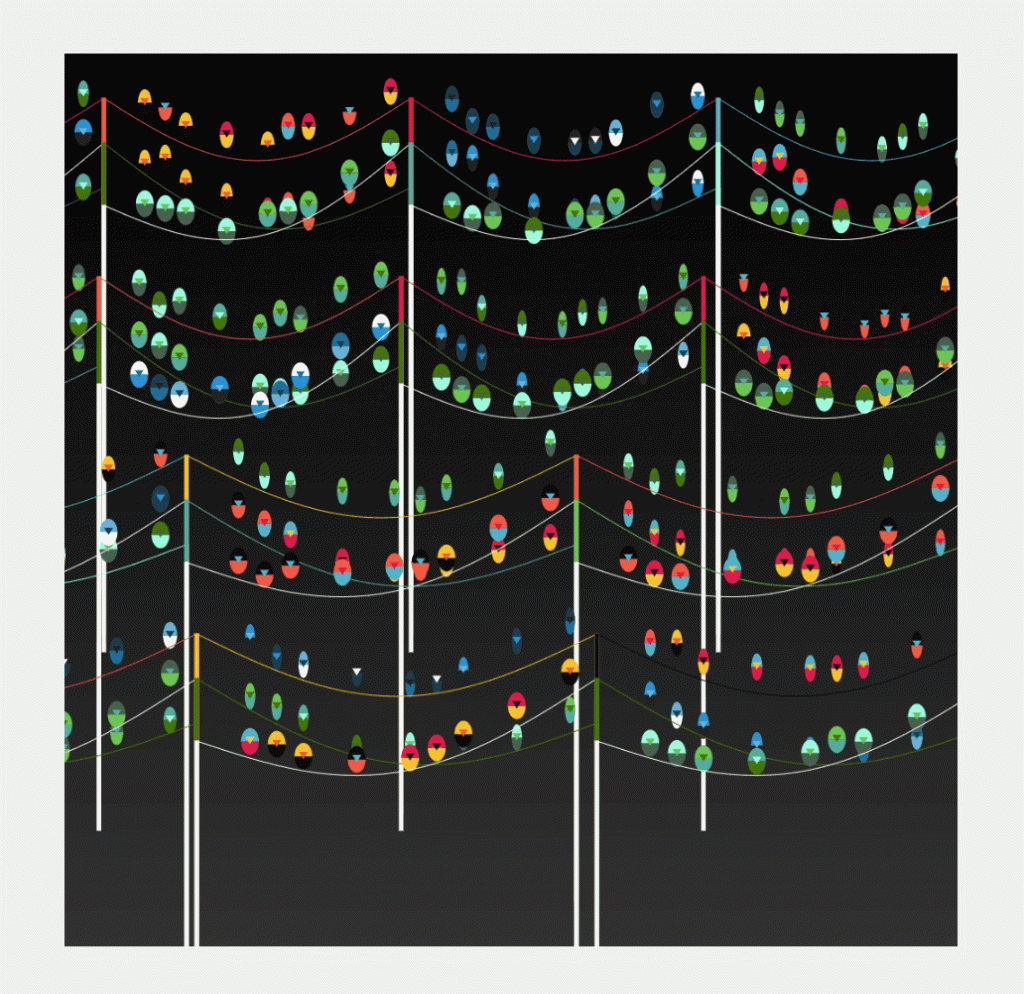
十四、多種情境
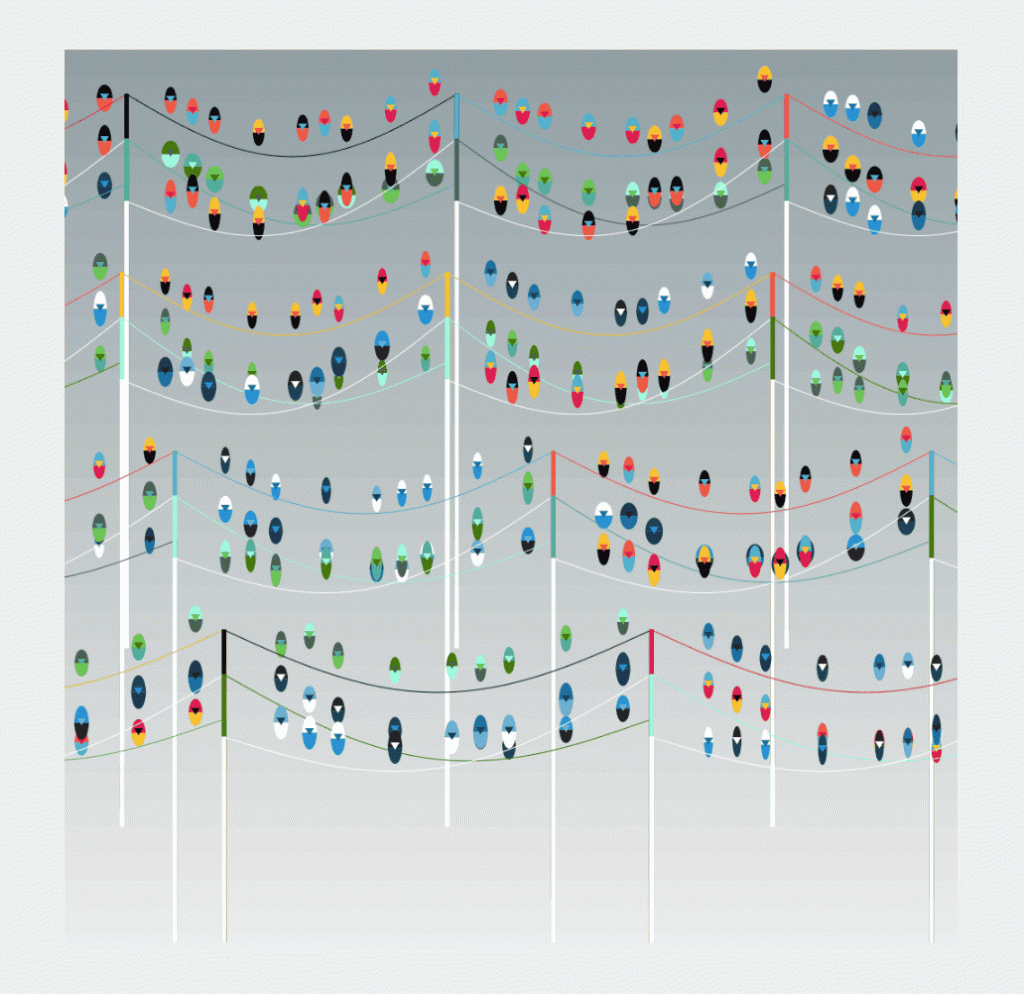
接下來要做的是如何用同一組演算法,來做出不同作品的效果。首先在 setup 中定義出幾種不同的情境,像是早上、中午、晚上,接著在 draw 裡面設定每種情境之下的背景漸層顏色,這樣一來當我們每次按下重新整理時,就可以隨機看到不同色系的作品了。
// mysketch
function setup() {
  // 定義 currentTime,需要再 setup 裡面,是因為要在這裡才能夠使用 random
  currentTime = random(["day", "night", "evening"])
}

function draw() {
  // 根據不同的狀態設定不同的顏色
  let startColor = color("#000")
  let endColor = color("#333")

  if (currentTime == "day") {
    startColor = color("#92a0a5")
    endColor = color("#eee")
  }

  if (currentTime == "evening") {
    startColor = color("#ffca59")
    endColor = color("#f43030")
  }
}
十五、滑鼠互動
除了讓鳥隨機的跳動之外,這裡增加當滑鼠移動到鳥身上後會跳起的效果,使用計算距離的 dist,計算出鳥的位置與滑鼠之間的距離小於一定距離時,便會向上移動。
translate(midPoint.x, midPoint.y - this.birdSize.y / 2)
translate(0, noise(i + frameCount / 50, this.randomId) * 50 - 30)
// 當滑鼠的距離跟鳥很接近時,會向上移動
if (midPoint.dist(createVector(mouseX, mouseY)) < 100) {
  translate(0, sin(i + frameCount / 30) * 30 - 15)
}
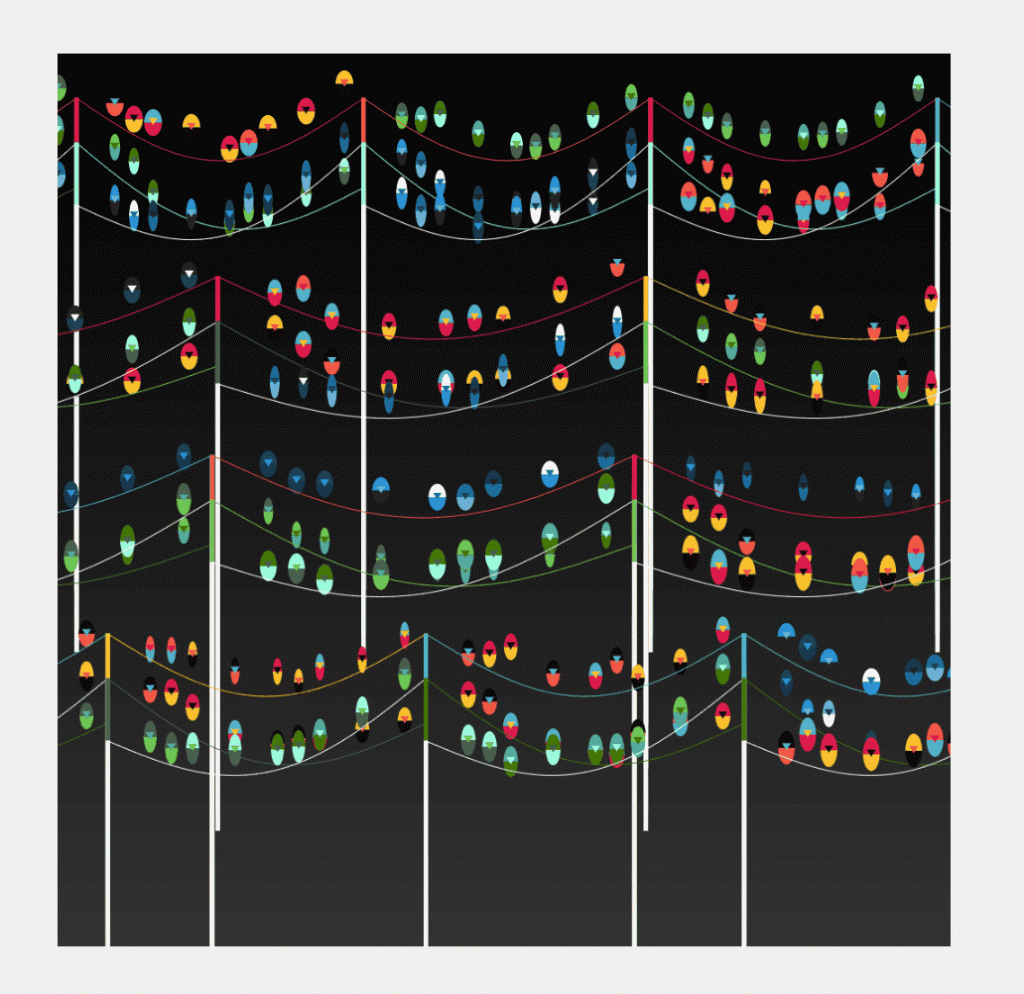
十六、電線桿粗細
最後在電線桿的粗細上做一點調整,讓前面的電線桿比較粗、後面的電線桿比較細。決定電線桿前後的參數是 o,一共有五層,所以在桿子的寬度上可以用常數乘上 o 的方式,讓越下面的電線桿越粗,製造出層次感。
for (var o = 0; o < 4; o++) {
  let barDist = random(300, 500)
  let startY = o * 200 + 50
  for (var i = 0; i < 5; i++) {
    let startX = -300 + barDist * i
    birdBars.push(new BirdBar({
      leftPoint: createVector(startX, startY),
      rightPoint: createVector(startX + barDist, startY),
      colors: random([colors1, colors2, colors3]),
      birdSize: createVector(random(10, 20), random(30, 30)),
      barColor: random(colors1),
      // 讓前面的電線桿比較租
      barSize: createVector(4 + o * 5, 500)
    }))
    birdBars.push(new BirdBar({
      leftPoint: createVector(startX, startY + 50),
      rightPoint: createVector(startX + barDist, startY + 50 + 50),
      colors: random([colors1, colors2, colors3]),
      birdSize: createVector(random(10, 20), random(30, 30)),
      barColor: random(colors2),
      barSize: createVector(4 + o * 5, 500)
    }))
    birdBars.push(new BirdBar({
      leftPoint: createVector(startX, startY + 120),
      rightPoint: createVector(startX + barDist, startY + 50),
      colors: random([colors1, colors2, colors3]),
      birdSize: createVector(random(10, 20), random(30, 40)),
      barSize: createVector(4 + o * 5, 500)
    }))
  }
}
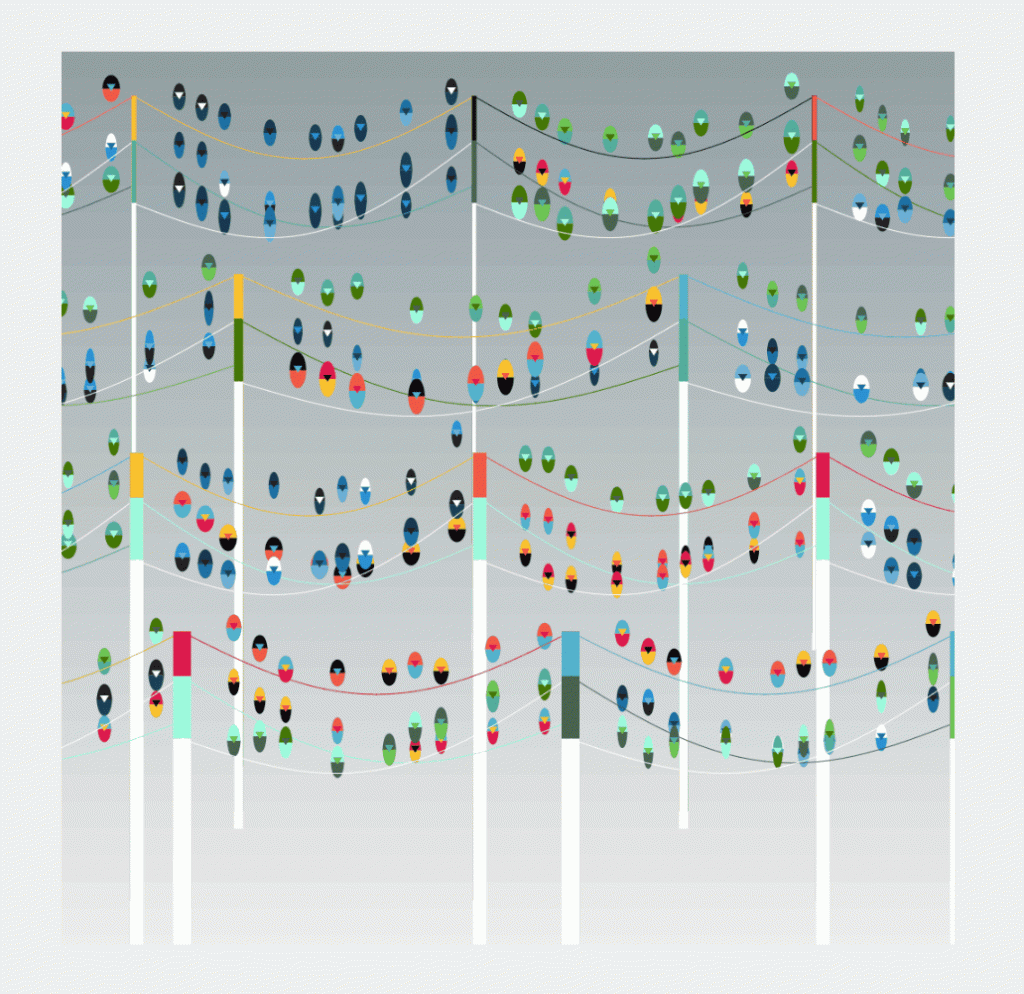
總結
回顧一下這次的鳥與電線桿的製作過程
- 建立建立第一組電線桿,使用 lerp 方式製作弧形的電線
- 新增一個 tab 檔案,用於建立 class,並在主程式 sketch 中透過 class 建立物件
- 在電線桿上每一個點的位子 midPoint 上劃出鳥的外型並且上色
- 以 for 迴圈的方式建立四組電線桿
- 使用一格格色塊的方式製作出背景漸層的效果
- 在鳥的外觀、數量以及動態的呈現上做調整
- 修正電線桿的間距以及數量
- 對鳥的部分細節做調整
- 改變電線桿與背景顏色
- 針對不同情境設定不同的背景顏色
- 調整電線桿粗度,產生前後層次感
以上就是我們用p5.js寫出來的作品啦!相同的繪製原理還能應用在甚麼作品上呢?
延伸閱讀:
用p5.js玩創作,讓小機器人動起來!哲宇的互動藝術體驗(直播筆記)
【p5.js創作教學】Aqua Planet 水色星球 – 來製作發光碰撞的行星吧!(直播筆記)
【p5.js創作教學】Quantum Unstable 量子不穩定 – 發光糾纏的量子系統
若對互動藝術程式創作有興趣,歡迎加入老闆開的Hahow課程互動藝術程式創作入門,與另外將近兩千位同學一起創作吧!
此篇直播筆記由幫手 阮柏燁 協助整理

